smj
Forum Guide
  Traditional Council
Posts: 1,819
|
Post by smj on Feb 9, 2007 22:45:05 GMT -5
So you are going to back an ipe bow - you want to get a board that has the grain straight down the board from one end to the other, no knots. It really don't matter which way the cut is made. As to ring thickness, I find it a bit hard to gauge some times. Thick is good but not so important this time around as you are putting bamboo on it for a backing... If you get a wide board, the grain may run side to side - but you can cut a proper bow board out of it, often times getting more than one bow board out of the plank. The last one I bought was $18 - but I got three bows out of it. Look for a shop that sells deck wood. They often have it. Or call Home Depot and ask where to go to find it around where you live. They will usually share that info with you.
I have a challenge for you... Now that you've built a bow, you should instruct BT how to build one...
|
|
|
|
Post by BT on Feb 10, 2007 18:42:17 GMT -5
You have been doing so well on this! I am glad that you have taken the time and added this project to the site because obviously it takes many peoples input to make a place worth coming to. This is just a great read along and I have to thank you and smj both for taking the time to share these Bow builds.  |
|
Coca Cola
Board Regular
 Formerly, upthere.
Posts: 406
|
Post by Coca Cola on Feb 11, 2007 19:15:20 GMT -5
I have a challenge for you... Now that you've built a bow, you should instruct BT how to build one... Can't do the impossible  ;D ;D. It might be awile before I start the next one. I have a couple of important ski races coming up. Hopefully in next 2 weeks I will get started, but no guaruntees. |
|
Coca Cola
Board Regular
 Formerly, upthere.
Posts: 406
|
Post by Coca Cola on Feb 11, 2007 19:47:00 GMT -5
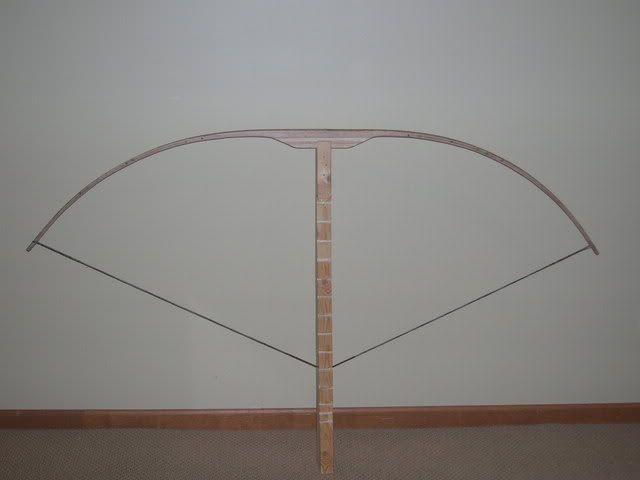
Grrrr.. Just took pic of it 1 inch short of my DL and look at the tiller, it hasnt improved much. I was sure it was better. Do you think this is sufficiant? or should I work on it more?  |
|
|
|
Post by BT on Feb 11, 2007 21:50:53 GMT -5
Maybe my eye's are going but I am betting your going to require a high nocking point for proper arrow flight.  Let me know  Just a guess on my part. |
|
Coca Cola
Board Regular
 Formerly, upthere.
Posts: 406
|
Post by Coca Cola on Feb 11, 2007 22:21:18 GMT -5
What is high? 1/4, or 3/8 above center?
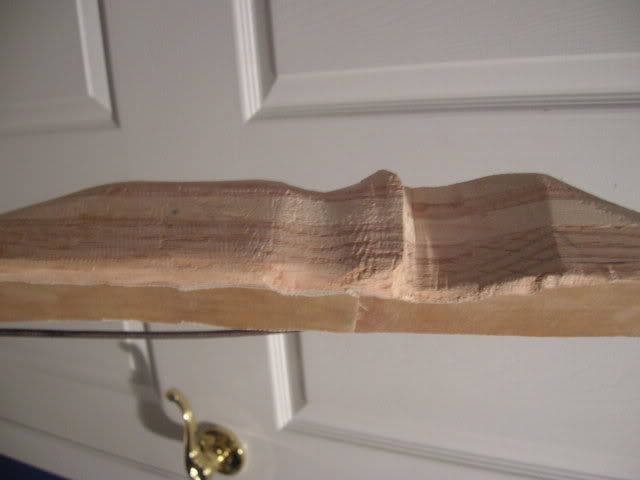
I started to shape the handle. It looks pretty cool so far. I might be able to finish it tommorow.
|
|
smj
Forum Guide
  Traditional Council
Posts: 1,819
|
Post by smj on Feb 11, 2007 23:29:01 GMT -5
Don't worry about high or low or inbetween yet. Get some arrows that are spined for the draw weight and length - then see what it takes to get them to fly right. Although, if you don't have a smooth release of the arrow it might take a while to figure it out. When I get tired or have not shot for a while my release gets out of whack - I tend to pluck the string... (Maybe I get thinking about my guitar?) Anyway, you might start at a quarter inch up, then move it up or down no more than an 1/8 inch at a time.
As to tiller - keep in mind that to adjust it you have to remove wood. This means your draw weight will change. Now, if you get to weak you can move the nocks in towards the grip a bit - like 1/2 inch to an inch. This will buy back some draw weight because you change the moment, or leverage, on the limb. However, shorter limbs are more difficult to tiller but are usually faster, but stack quicker. So, this can become an interesting chase! If you are not pleased with the tiller, go ahead and change it - but use extreme care while doing so. Then see what the draw is, then move the nocks if you have to for weight. But keep in mind that this is a diminishing return. You change the limb length, you change the compression in the limb. Hence, it may not keep the tiller you just set it to! One person grabs the bow and over draws it - you may loose the tiller you set. Bows made this way can become very personal indeed!!! To me, this is part of the charm! Also, in reducing the limb, you could uncover a flaw in the wood that is lending to your tiller woes right now - but is as yet unseen. Anyway, that's enough of the negative things to make you worry a bit! If you have a tiller problem, I say fix it. If you have a weight problem afterwards, I say move the nocks. This is how you learn what you are doing. Making bows like this is a craft learned over time and through experience. Feel good about what you are doing, and think about just how long folks have been making these things. You are joining what is probably the third oldest profession the world has ever known, hunting in general probably being number 2. And this is one both you and your mother can be proud of...
|
|
smj
Forum Guide
  Traditional Council
Posts: 1,819
|
Post by smj on Feb 11, 2007 23:41:15 GMT -5
Oh, yeah, your grip...
The grip section I find to be very personal. Every bowyer I know seems to do something just a bit different. Seems like they all shoot arrows, although Dean Torges has a strong arguement for making the whole section round, bulging the grip, and avoiding a center cut(Just cut enough out for a rest, spine the arrow to flex around the grip.). I like the center cut, but must admit I am thinking about trying a few bows without just to see what I think of what he says. There a method to getting the grip section round - just keep knocking the edges off to a facet, then do a smaller facet on each edge of the original one. Once you have facets all the way around, smooth it with sand paper.
You do not want a flat rest. Round it, or ramp it with the peak of the ramp right above the deepest point of the grip, where that little flap of skin between your pointer finger and thumb will sit when gripping the bow.
|
|
Coca Cola
Board Regular
 Formerly, upthere.
Posts: 406
|
Post by Coca Cola on Feb 12, 2007 21:17:40 GMT -5
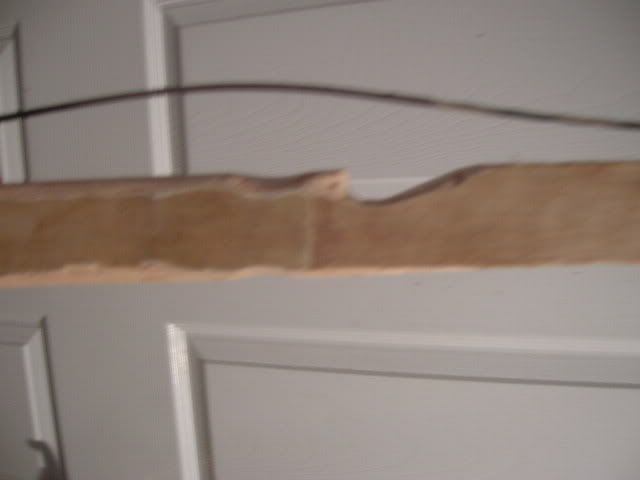
  The pictures make it look worse then it is. I still have some work to do but for the most part its finished. I really like it. We only have 1 saw at my house and it only cuts in a straight line so I cut down 3/8 of an inch and that is the shelf. I realized there isnt an arrow in the world that can fit in a 1/64 of an inch slit so I decided to make it bigger. Then so it wasnt just a line cut down the bow I rasped the rest of it out. Yep all with a rasp and alittle help from a saw. What do you think? I still have to get some tool marks out but am done with handle. I might be able to shoot tommorow. smj I tried to round the rest but was not succesful I did my best I will give it another go later. This might be all for awile. I have regional ski race soon. |
|
smj
Forum Guide
  Traditional Council
Posts: 1,819
|
Post by smj on Feb 12, 2007 23:29:57 GMT -5
If you have a straight rest cut out, you can use a different method that I have used and really like for the arrow rest. See if this makes sense to you, if not I'll try to post a pic in the next day or two... I keep getting caught up in other stuff going on and have not gotten to my posting yet! Sorry everyone!
Anyway - you have a flat shelf, and want a curved one or a ramped one. The ramped one is easy to make, you can use a different wood for a contrasting look. Cut a quarter inch thick slab of wood, then shape it the same size as the arrow rest cut out. Once it fits well, you can thin it a bit if you'd like a lower rest point - it depends on how high you cut the arrow rest to begin with to some degree... Now, once you have the height and thickness and fit you want, mark on the top side of this little part the deepest point your grip goes in to the handle if you have a deep grip. I refer to where the flap of skin between your thumb and pointer finger rests on the grip or handle of your bow. You want the high point of the rest to be at the same depth. (If you have a shallow grip, somewhere around a quarter to the third of the way from the belly forward. You want the high point to the belly side of the bow, not the middle.) Then reduce the top of the block to either side of your mark, leaving the marked section about 1/8 inch wide. This should give you a ramp toward the belly of the bow and a second ramp toward the backing of the bow. The ramp towards the belly will be much shorter than the ramp towards the backing. Reduce the ramps to at least 1/2 the thickness or a bit more. Check the fit, glue that puppy on! Sand off the excess glue once dry, done. I like the ramp rest a lot and it is easy to make and get placed. Make any sense at all? I have thought about picking up a chunk of ebony just for cutting rests out of. You might need to cut a little bit more off of the rest area before you glue the ramp on if the combined height leaves the rest to high.
Of course, you can always sand a curve on the rest with a file, too! And maybe that is the easy route... Some times I get a bit biased! Sorry.
|
|