|
|
Post by BT on Jan 5, 2007 7:12:52 GMT -5
Work a little, take some time off and think about how you want to proceed. You will make fewer kids bows and fire wood that way... ;D Nothing wrong with a kids bow or a nice fire  |
|
smj
Forum Guide
  Traditional Council
Posts: 1,819
|
Post by smj on Jan 6, 2007 11:00:42 GMT -5
So, I have continued to do a bit of work on the bow but am finding less spare time than over the holidays! The company I work for expects me to get some things done, my family seems to think there are several things more important than building a bow… Can you believe that? Anyway, let me give you an update... 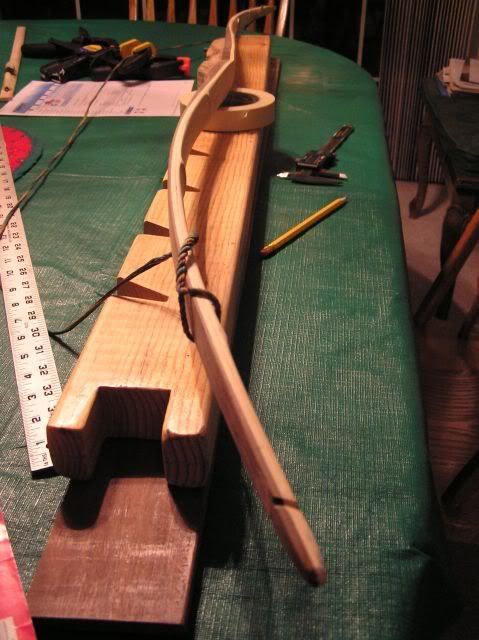 I have started on the tillering, and found that my bow drew about 500 pounds. I worked down the belly stock thickness a lot – it scares me to see how thin it is now! Yet, I am told that Ipe gives thinner limbs due to it’s stiffness, and I added an extra layer of bamboo adds draw weight as well. I took a lot off the belly of both limbs, and tried to string it. I could not, it drew to hard. So, I took some more off. Now, I read where you want to string the bow as soon as possible… OK, I tried it. Bad idea, it went right to a hinge on the top limb. So, I had to go reduce the lower limb even more! This is the way tillering goes, take some wood off and see how it bends. Then bend it a lot so that the limbs start to work in a little. Right now, when I check with the scale after all the reducing, I get 38 pounds for 8 inches of draw with an extra long string (This leaves the bow as if unstrung when not pulling on the string). There are two things to deal with when tillering: hinges and stiff spots. A hinge is a bend in the limb, a stiff spot is just what it sounds like, a section that does not bend enough. What you want is nice even flex where all is balanced, flex wise. The lower was a lot more stiff then the upper, so, I have thinned the limbs a lot trying to get to a draw weight I can deal with. Looking things over, I see that I did not get the backing as uniform in thickness as I should have. With bamboo, you will always have thickness changing at the nodes, depending on how much of them you keep, but the center thickness between the nodes of the bamboo needs to be the same. I will reduce the bamboo between a couple of nodes just to even things out a bit. Normally, I use calipers to keep track of thickness of the bamboo – this bow I wanted to eye-ball it and see how it came out. (I am not building this bow for anyone since it is the first Ipe and first extra bamboo layer bow I have built, so trying things is OK on this one!) I will go back to using the calipers! It really makes a difference when you add that extra layer of bamboo with the extra glue joint! It does add draw weight! 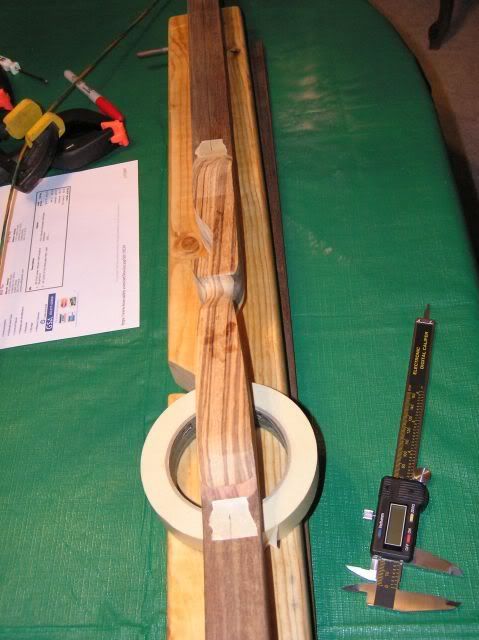 I marked the center line of the bow from grip to tip for both limbs. This way, I can measure to see how much the limbs hold the same distance either side of center along the length. I divided the limb in to thirds, and marked lines across the limb at 90 degrees to the center line and measured at these cross lines with calipers both sides of the center line. Then you can mark how far off the limb was from even taper. After that it’s back over to the sander to remove the extra limb width where required. One limb was off in the last third, good at center and up by the grip. The other side of the bow required adjusting the last third on one side of the limb, and the other side of the limb up by the grip. Again, the middle was fine. By the way, you will also want to check that the tip to tip center line goes through the middle of the grip as well. A simple check with a string will tell if all is well. 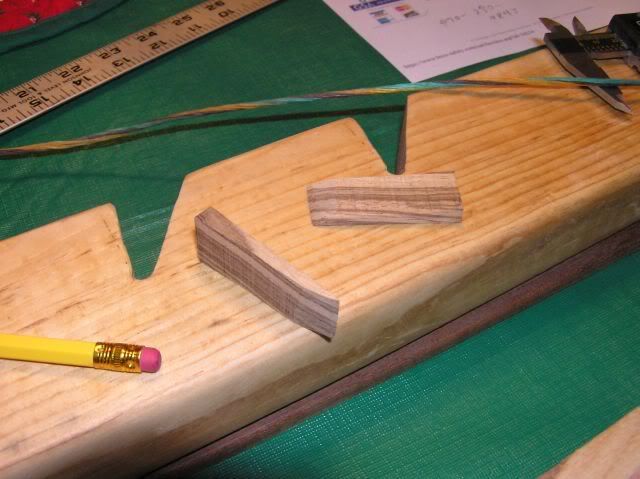 So, for tip overlays on this bow we are going to use some trimmings from the grip area. When the grip was added, I cut a couple slices off of each end of the grip block. This was to start to give the grip block some shape. Anyway, those cast-offs will work, I think, for tip overlays. I cut the thicker wedge in two after sanding it a little. One for each tip, both the same length! 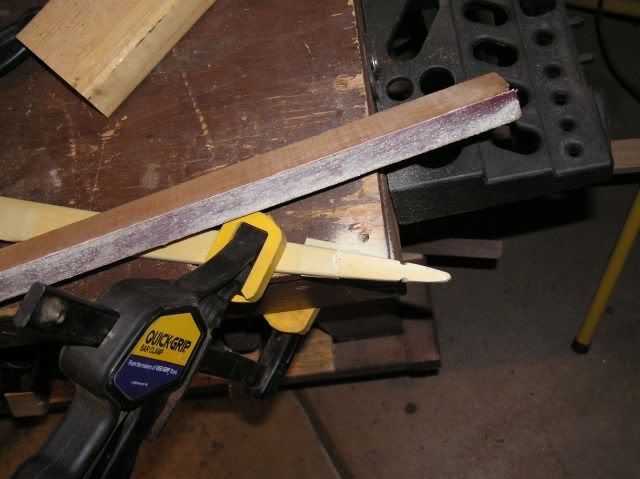 First thing is to make them fit together well so I flatten out the tip of the limb. Another approach would be to dig some contour in to the back of the tip overlay so that it wraps around the curvature of the bamboo backing on the tip. Right now, I favor making bow surfaces to be glued flat. Your choice. Note my super big “nail file” above. This is a sanding belt that I cut so that it would become a long strip. Then it was glued to a block of wood. This is a great tool and comes in very handy indeed! You can shape the edge of your bamboo pattern with ease, or a limb for that matter. The length makes much easier to get nice results than some sort little block. 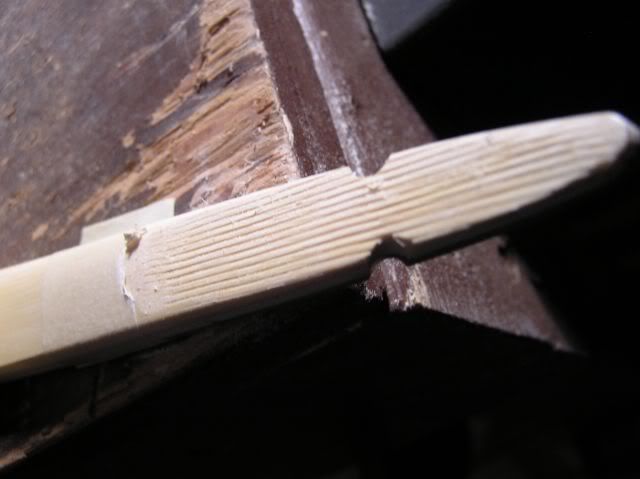 Don’t forget to create those glue lines on all surfaces to be glued! If you recall, this is done with a hacksaw blade. I put a wrap of tape around the limb to mark where I want the overlay to rest. It just makes alignment easier. The process of gluing stuff on is the same, we can’t do much for at least 12 hours, and Sunday I am at volley ball all day… Maybe Sunday night we shape the tips again. They won’t be so long, and I will be able to dig into the zebra wood I’ve added to help make the nocks more stable. Right now, after sanding the sides of the limbs to even tapering – the nocks are now to shallow to hold the string. Hence, I can’t show you the bow strung yet. Sorry! (Tillering nocks are temporary, so no worries!) We will get to that shortly. Also, I should show you how it looks when set up for tillering, too. Other than setting the tiller, mostly I have been reducing belly wood to try to drop the draw weight, we will have to clean up the grip and put a finish on it. |
|
|
|
Post by BT on Jan 6, 2007 21:07:16 GMT -5
Whats the matter?....500# a bit overkill  ;D That bow looks great  I like the thin body style even though you may not have meant for it to be that dramatic. |
|
smj
Forum Guide
  Traditional Council
Posts: 1,819
|
Post by smj on Jan 7, 2007 23:16:57 GMT -5
Wow, I made it sound like there was nothing to do left on this bow… What was I thinking? 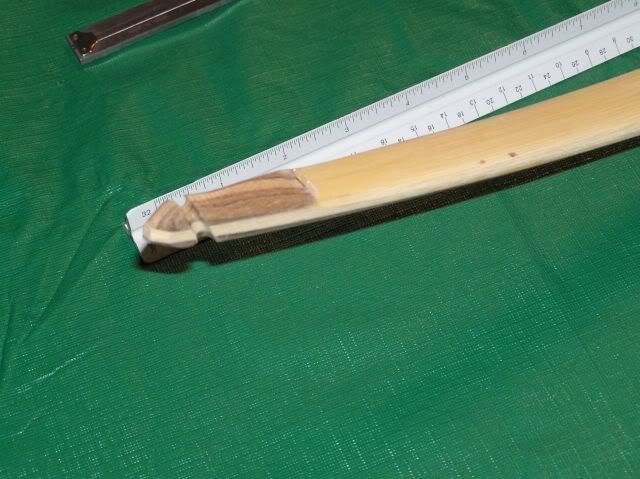 So I’ve added the overlay to the tip, and changed the style a little bit. The old tip was long and a fair amount of mass – I am working down to a tip smaller, but thicker. This should hold the string in place very well. Big tips are just mass that is not doing anything but going along for the ride. Always good to reduce that! 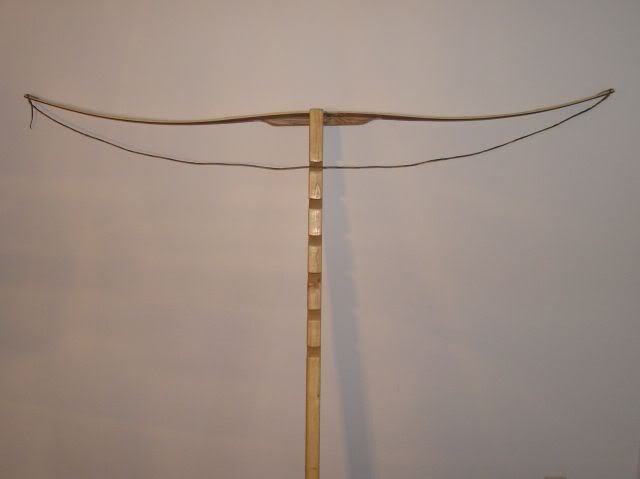 Here is a series of three pictures on the tillering rack. The first is with no tension. 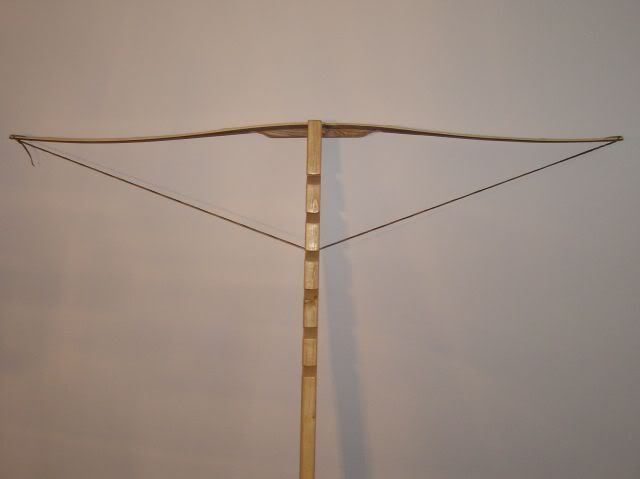 Here we are with a little tension. The string cuts in the tillering stick are 4 inches apart, so we are at 4 inches of tension. 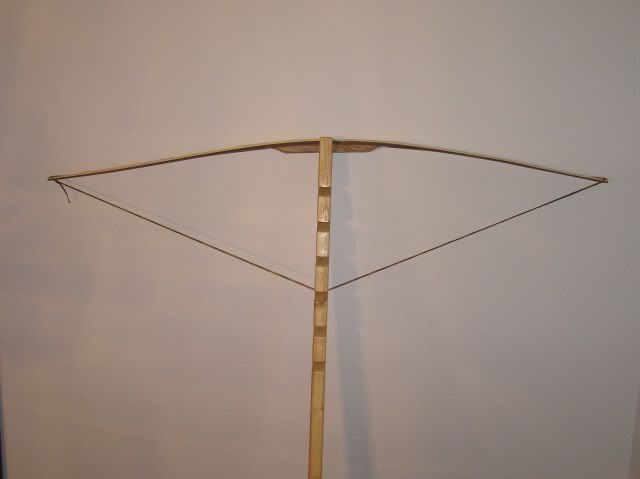 In this one we are at 8 inches of tension. Note that the top limb, to the right, has a bit more flex than the lower limb, to the left. This means that the lower limb is more stiff. If you look at the left limb, you will see that a trace of the reflex still remains. At this tension, we have 38 pounds measured on my little scale. Before, when just dropping tension, I would pull with the scale to .5 inches, 1 inch max. No more than that. Also note that the right limb also shows a trace of reflex, but no hinge. Tillering has to be done with care, and no worries about how quickly you get it done. A poor job of setting the tiller can leave you with a substandard bow, a tear in your eye, and starting over. By the way, if you are wanting to take up making bows, and asked me for one book on the subject – I’d suggest three: Bowyers Bibles, vol 1 through 3. If you were say that was to much and repeated the question, I’d probably say “Hunting the Osage Bow” by Dean Torges. This is a great book! Dean takes you from cutting a tree to a fine working bow… And all the steps in-between of course! Why this book over the Bowyers Bibles you might ask? It is a thrifty read, much more condensed. It takes nothing away from the Bowyers Bibles, might even add a few pointers! It would make a good first read on the subject. Once you’ve read it and made a bow, read it again. Then make another bow! You can find it at: www.bowyersedge.com/books.html ($19.95 + $4.50 S&H) |
|
Greg Krause
Moderator
PRO STAFF 1
AKA- Skipmaster1
Posts: 3,990
|
Post by Greg Krause on Jan 7, 2007 23:25:26 GMT -5
I've been following you through this, I haven't been posting but rather trying to absorb the info. Thanks, this is a great thread.
|
|
smj
Forum Guide
  Traditional Council
Posts: 1,819
|
Post by smj on Jan 8, 2007 10:04:55 GMT -5
I am happy to hear you are enjoying it, and also hope you are getting an idea of tools to use. I'll try to get some photos of the files and rasps I like, and try to point out where they were used.
|
|
smj
Forum Guide
  Traditional Council
Posts: 1,819
|
Post by smj on Jan 10, 2007 17:17:54 GMT -5
Well, I have some unfortunate news to report. I had the bow strung, drawn to 28 inches on my tillering stick, set up at eye level to take a good look at it – checking on those last adjustments. (They looked pretty good, too!) I was reaching for the camera to take a picture… The bow and tillering stick tipped to one side and crashed on to the cement floor, landing on the top limb tip. The bow did not survive the incident. My apologies to all! I will finish this with the next bow.
I found out Monday afternoon that I need to head in for surgery next Tuesday… I should have let the bow sit until afterwards. I think I was a bit overly distracted and just didn’t watch how I set it on the stool as closely as I should have.
Sometimes, you just have to move on… I have more Ipe, zebrawood, and bamboo! I t will probably be 3 or 4 weeks, but I’ll get back to it and share with you when I do.
|
|
|
|
Post by BT on Jan 10, 2007 20:34:24 GMT -5
That Sucks!  Good attitude though  What surgery?  |
|
smj
Forum Guide
  Traditional Council
Posts: 1,819
|
Post by smj on Jan 19, 2007 21:53:23 GMT -5
Well, gosh, that was all fun! I made it through surgery - again, nothing huge this time - and am able to sit at a computer again for a bit. I've also been eyeballing that bow... I don't think I am ready to pitch it just yet... There is a fine bow still in there, I think, I'd like to meet it. Anyway, give me a week or two and I'll show where I might get with it!
|
|
|
|
Post by BT on Jan 20, 2007 8:12:40 GMT -5
Glad to hear your back  Did the Doc give you a good prognosis to take home? |
|