smj
Forum Guide
  Traditional Council
Posts: 1,819
|
Post by smj on Mar 18, 2007 22:33:56 GMT -5
The grip section on this one is 13 inches long. That would be the purple heart wood length. The black palm, I think it is, is 12.5 inches long. So, here are the winners! I need to pick up some thin purple heart for the tip overlays - I will use the same woods on the tips. 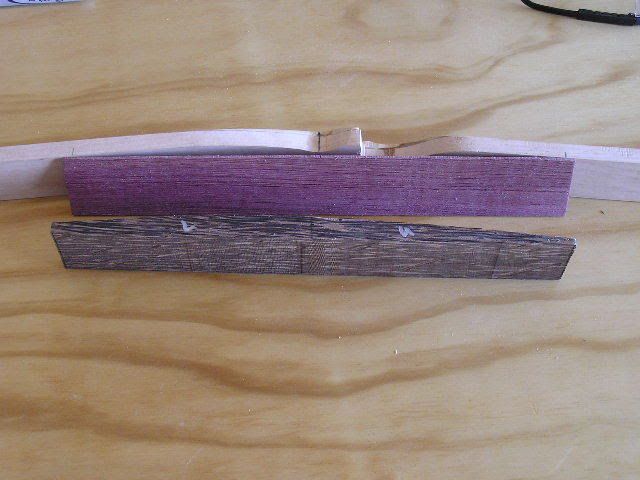 Hey easternhunter - I think you have the right idea with your bow: slow and steady! If something don't make sense, stop, think about it over night, try again another time! What ever you do, don't take off much wood at a time. Also, a flat belly is the hardest to tiller. If you leave the center 1/3 rd of the belly flat between the grip and tip on both limbs, and then for the 1/3rd to either side taper down about 1/3rd of the way towards the back of the bow, it may help you. This leaves you with 4 new facets on the bow, each extends from the grip to within about 4 inches of the tip of the limb, one on each side of the belly of the limb. Correct tiller by taking wood off from the middle third, adjust draw weight by taking wood off of the facets running down the sides of the limb. Belly _ / \ The cross section looks roughly like this, only the side cuts | | won't be nearly so steep in reality... Back of Bow |
|
|
|
Post by easternhunter on Mar 19, 2007 10:47:30 GMT -5
Well......it ain't pretty. actually it's quite ugly. My bow died a quite death, but helped me learn something in the process. I found a stress crack about 1/4" long just before my sweep back to reflex..Strange place of that type of stress I says. Well let's see if I can get underneath it. No such luck...as I scraped, I found more stress(compression) fractures I guess, until I had half a dozen or more in the same area. I'm guessing that by applying all that deflex, I over stressed the poor maple belly.  Once I discovered all these crysals, I had a choice....tiller it til I had something(anything to call a bow) or use it as a practice model in tillering, just to see what I had to do to get that &^%%$#%deflex sweep to bend proper.  Well, I learned from this one, and as stated earlier, I'm ready to do a 'Z' splice with some JATOBA and back it with one of my hickory slats. Will scale it back and make a straight profile longbow this time......never figured it would be a bow to be proud of anyhow. Sorry for the disappointment guys. BTW, SMJ can you provide me th dimensions on that BBH you're working on now..limb width etc. might ease my grief somewhat...     I'll carve off the limb tips as salvage at least. |
|
|
|
Post by stilllearning on Mar 19, 2007 11:19:12 GMT -5
Sorry to hear that .... I was looking forward to seeing a few arrows coming out of that baby. Oh well now I know that when you make me one it will be a good one.
|
|
smj
Forum Guide
  Traditional Council
Posts: 1,819
|
Post by smj on Mar 19, 2007 12:54:00 GMT -5
Rats! I am sorry you didn't get a little more out of it. Still, the second bow will go a lot better for you, of that I am sure! You took a lot on a lot for a first bow, a basic flatbow is a lot easier to tiller than an R/D design. Toss in those curves you ended up with in the limbs and you really had a lot of tough work to get through! It was a grand effort though and I am sure that you learned a lot from it. What you learned is probably worth more than the materials cost!
My patterns are elliptical tip to tip, 1.5 inches wide at the mid point. I also have a more narrow pattern that is 1.25 inches wide at the grip. However, for the more narrow pattern you can not use a purely elliptical form as the tips are not wide enough for the nocks. You have to add back some width at the tip. I think I posted one of my grip patterns a page or two back on this posting. Lenth is usually 68 inches tip to tip. Nocks I cut in at a half inch or an inch down from the tip. Gives me some flex on limb length, which relates back to draw length. You can also shorten the tip to tip length after glue up rather easy if want a shorter bow... Just whack some off and re-form the tips! Keep in mind that more narrow means more stress in the limb. I like the 1.5 inch pattern as it is easy to work with, a bit over-built when bamboo backed, seems to last well with hickory bellys. The more narrow pattern I save for ipe or osage bows. The bows I've made are conservative. The bamboo matches the edge of the limb. Most make bows that the edge of the limb comes out from under the bamboo just a bit. Hence, a 1.25 bamboo pattern will turn out about a 1.5 inch limb near the grip. However, by the time you get all the way out to the nock, the bamboo is once again right at the edge of the limb. The extra limb width is only for the first 2/3rds of the limb length. The last 1/3 of length out to the tip stays under the bamboo. Let me know if you need further details!
|
|
|
|
Post by easternhunter on Mar 19, 2007 16:48:47 GMT -5
SMJ....can you suggest a thickness of belly wood to start with if backing with hickory?
I'm using Jatoba on this one...I think it's similar to IPE in property and hardness.
If I splice billets, I'd like to put a taper (if needed) on the thickness before gluing the splice.
|
|
smj
Forum Guide
  Traditional Council
Posts: 1,819
|
Post by smj on Mar 19, 2007 21:09:07 GMT -5
Do the Z splice with the wood flat. Easier to clamp, easier to get straight. You don't want to be more than a half inch thick, maybe 0.45, just under a half. I am not sure, I've not worked with jatoba before. With ipe, at a little bit over a half inch, I couldn't bend it over my jig to the curve I was after. Once glued, then taper the limbs on the belly from just outside the grip block to the tip. I start with an eight inch of taper, if I can't get the wood to flex - with some effort - to my jig than I take just a tad more. Or if I don't like the flex of the limb while on the jig - I take a tad more from the area I want to increase flex. NOT MUCH AT ALL! Very little wood removal is required to change things up. For me, here is the grip sequence of the hickory/bamboo I am working on... 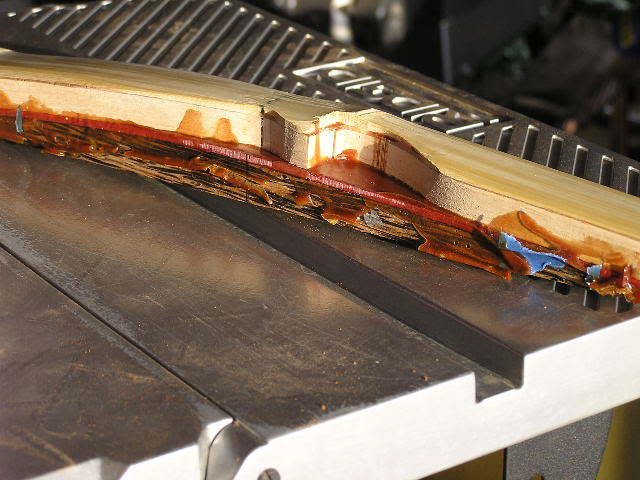 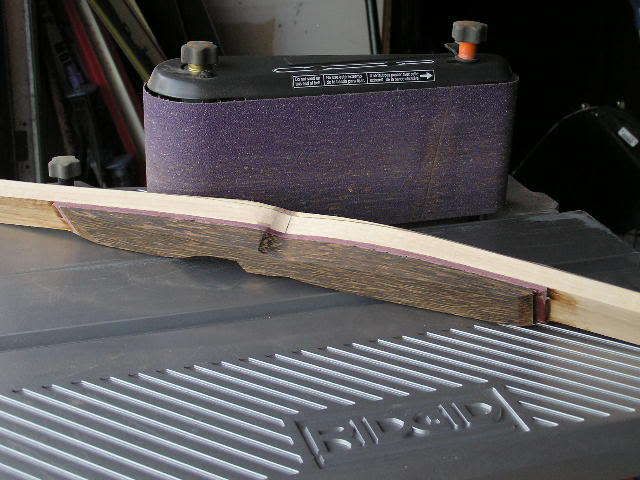 And the little ipe bow I've been working on looks like this now - I like to place a small pad of wood on the grip to fill out the grip under the hand. So, I make the grip block thinner than some, then add to it for style and function. 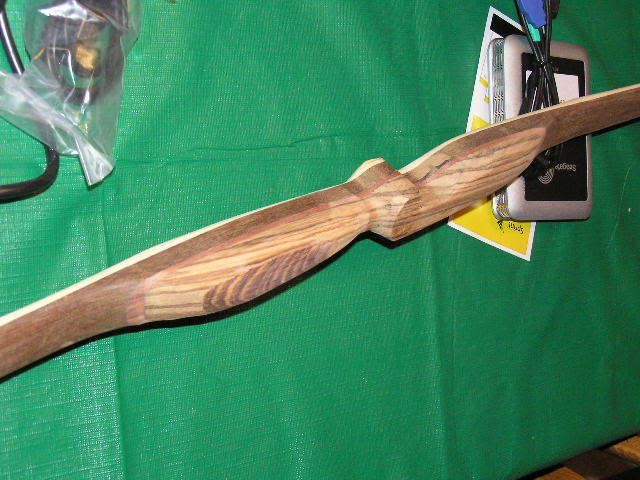 |
|
|
|
Post by easternhunter on Mar 20, 2007 5:03:47 GMT -5
You don't want to be more than a half inch thick, maybe 0.45, just under a half. I am not sure, I've not worked with jatoba before. With ipe, at a little bit over a half inch, I couldn't bend it over my jig to the curve I was after. Once glued, then taper the limbs on the belly from just outside the grip block to the tip. I start with an eight inch of taper, if I can't get the wood to flex - with some effort - to my jig than I take just a tad more. Or if I don't like the flex of the limb while on the jig - I take a tad more from the area I want to increase flex. NOT MUCH AT ALL! Very little wood removal is required to change things up. I like to place a small pad of wood on the grip to fill out the grip under the hand. So, I make the grip block thinner than some, then add to it for style and function. SMJ, What exactly do you mean by"8 inch of taper? Is that from the riser block out along the limb? So if the blank is 1/2 inch total thickness(minus the hickory) do you taper of the fadesto less than that, maybe to 3/8" and run it from there?? Sorry for all the questions, but I'm soaking this stuff up! your new one looks like a great bow, can't wait to see it finished. |
|
smj
Forum Guide
  Traditional Council
Posts: 1,819
|
Post by smj on Mar 20, 2007 7:31:33 GMT -5
I goofed! I am sorry about that... That should read an eighth inch, as in 1/8 inch, of total taper over the length of the limb.
This is on the belly, you want to start about an inch or so outside of the grip area and then taper about 1/8th inch deep into the belly wood by the time you get out to the tip. This will allow for the limb to flex and give up the those curves you see on my bows. As for the fades coming off of the grip area, leave that area full thickness. You don't want to end up with a hinge just off of the fades.
Go back to page 2, right before the glue up, I am marking the taper on the limb with a metal rule, and then cutting it off on the table saw. Again, it is this taper that allows the curves I get on my bows. It really does not have much to do with tillering the bow. You just want enough taper to allow for the wood to flex in a nice way, give those arcs up! DO NOT put much more than an 1/8th of taper on the limb. You could mess your bow up and not get the draw weight you want, end up with whip-tips. Take enough off for flex, but leave plenty for tillering later, after the glue up is done.
I hope that makes more sense! Again, sorry!!!
|
|
smj
Forum Guide
  Traditional Council
Posts: 1,819
|
Post by smj on Mar 24, 2007 18:17:40 GMT -5
So it is raining today, this morning it was about 50/50 ice and rain. I want to finish the ipe bow up, but with all this humidity I have decided to wait - I would like the finish to come out nice. Also, I worry that the bow may be absorbed a bit to much moisture as it was in the garage where right now, the humidity is up there a bit. Keep in mind that wood absorbs moisture out of the air big time, and wet limbs are slow limbs. Also, the finish can "blush" on a damp day. So, I'll have to dry it out and finish it later. In the mean time, I found out that a local shop, Budget Home Repairs, now carries ipe. So I bought two 6 foot boards. One I like a lot, the other might be OK. It is hard to see in the light of the warehouse! 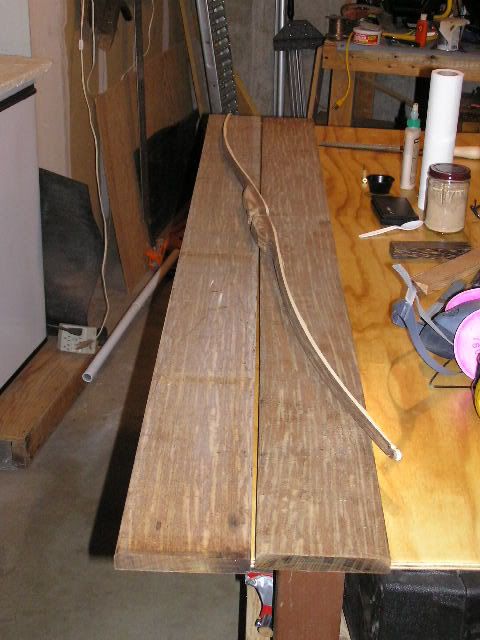 If I get 6 bows out these two boards, the cost will have been about $5 per bow for belly stock! Now if they would only carry bamboo... |
|
|
|
Post by easternhunter on Mar 24, 2007 21:35:41 GMT -5
SMJ...Glad to see you're still at it...can't wait for the full draw and target pics.
Well I set aside my maple bow and did my 'z' splice with the jatoba flooring boards I got. it was tough with hand tools, but the glue up and fit is way better than I hoped.
I'm going slow with every step this time...PROMISE! Tuesday, I tapered the limbs from 1/2" fades to 3/8" at tips...have not laid out the bow yet, but I'm taking a cue from you SMJ, and lay out the bow on my hickory backing and trim it out FIRST before gluing that to the belly. BTW, I also added a 1/4" powerlam of Jatoba to the back o fthe bellywood to stiffen it.
Glued up a riser blank of 2 - 1/2" jatoba with accent of black walnut between. (wanted to keep it simple)
No pics til Monday I'm afraid. This will be mostly a straight longbow with a bit of reflex.
Nobody I talk to seems to have much experience with Jatoba, but I see that JANKA scale puts it just a few points short of IPE, so we'll see what it turns out like.
|
|