smj
Forum Guide
  Traditional Council
Posts: 1,819
|
Post by smj on Feb 11, 2008 21:11:11 GMT -5
Well gosh - trying to return from a cold seems to be harder than expected! However, I did manage a few things... I finished a bow I have to get out this week, this is a good thing. A little tillering and then apply some dye and finish - maybe I should just show you what it looked like??? (we will be doing some of this in the near future, so it is not totally out in left field!)  Hickory, black palm, purple heart, bamboo, R/D design, 65.75" nock to nock, just over 50 lbs at 28 inches, starts to stack at just over 28 inches, elk antler rest. TransTint used to color bamboo and hickory.  Above is a peek at the front. A little cocobolo highlight, and it also allows you to form the round edge without removing more material, or as much as you'd otherwise need to, from the main belly stock, the hickory board! Need to keep a little depth in the middle so that the bow don't go CRACK!!!  The tips are purple heart and black palm, of course! Made small to reduce hand shock and limb abuse. 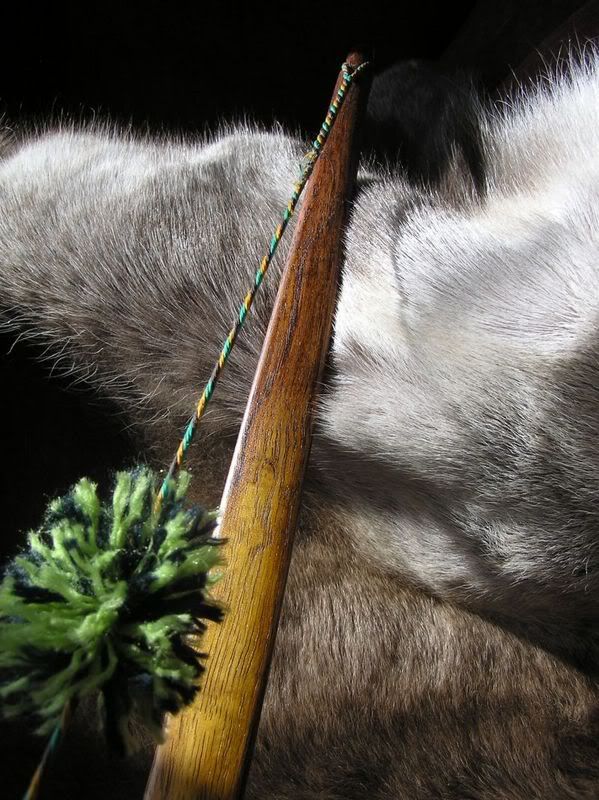 Hickory is a white wood. I got tired of white wood, hence, TransTint! I wanted chocolate tips on the belly side, with a faded center line. I also wanted dark sides. This type of finish work is what we will be going over in this build-along as we get to it. Forgive me for jumping the gun! Also today, I selected a couple bamboo strips and started to thin them down and work them to a shape we can use. I didn't post pics as I have done so before, should I do so again? Tell you what, I'll hit the highlights again and post it up tomorrow on this thread so nobody has to go looking! I'll get pics from this build though!!! |
|
|
|
Post by BT on Feb 12, 2008 7:04:43 GMT -5
Holy mackeral!~thats a sweet looking finish!! Your a great artist smj  |
|
smj
Forum Guide
  Traditional Council
Posts: 1,819
|
Post by smj on Feb 12, 2008 8:27:35 GMT -5
Thanks BT! It is fun to form an idea in your mind as to what a bow should look like - and then go make it. However, I think what has the most meaning is just how quiet it shoots, and how well it throws a 500 grain arrow!!! I will pop this bow in the mail today or tomorrow... If the guy don't like it I can only hope he sends it back to me!!! Just for reference, here are two pics of what this looked like before, when just roughed out - 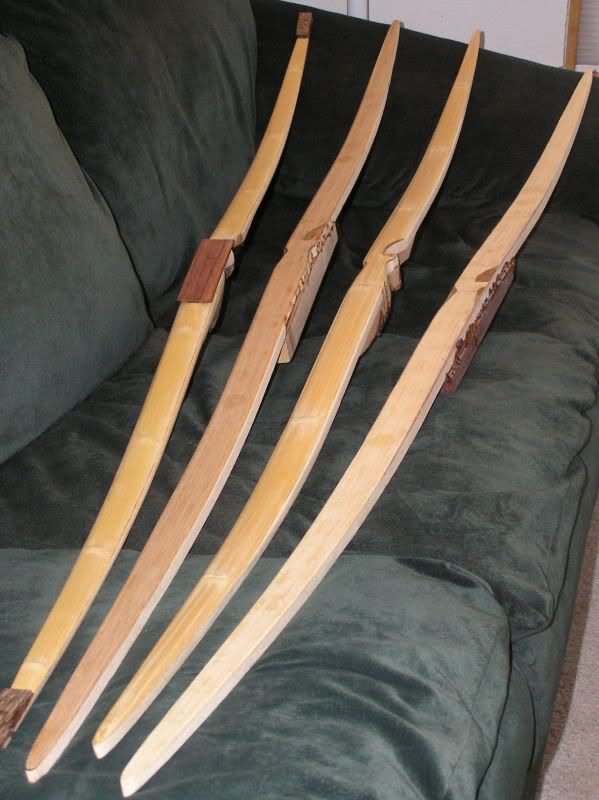 It is the bow on the left, nocks are glued on but not yet formed. (These are the bows I needed to get past glue work so we could move on with this build.) 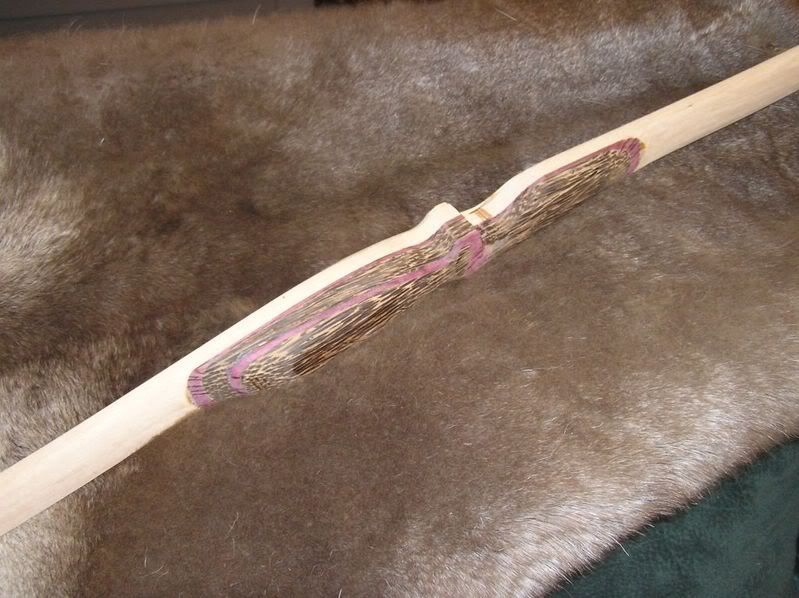 Here is a grip view of the bow above before smoothing and detailing and applying any dye or finish. OK - enough with the old, on with the current build! |
|
|
|
smj
Forum Guide
  Traditional Council
Posts: 1,819
|
Post by smj on Feb 14, 2008 19:09:55 GMT -5
So, let's talk bamboo. You order some bamboo, it comes in, you lay out everything to get going on making a bow. First, is the bamboo wide enough to make the bow you want to make. Our bamboo is all around 2 inches in width - but is it wide enough???  Notice how thin the walls of the round bamboo is compared to the bamboo that has already been cut... Another consideration is that you really want bamboo that does not have real high nodes. Thick nodes means no flex at the node. More nodes, more little sections of limb with no flex. Less flex, less energy stored in the limb, less cast from the bow for a given draw weight! Also, the power fibers run most dense near the rind (or outer skin of the bamboo). So, we want the bamboo thin for use as a bow backing, but we really want that section right under the rind! Take a peek - see how the "dots" get more dense closer to the rind. (By the way, leave the rind on for now, glue won't stick to it so this a bowyers friend for now! We'll remove it later as you can not get a finish to stick to the waxy surface!) 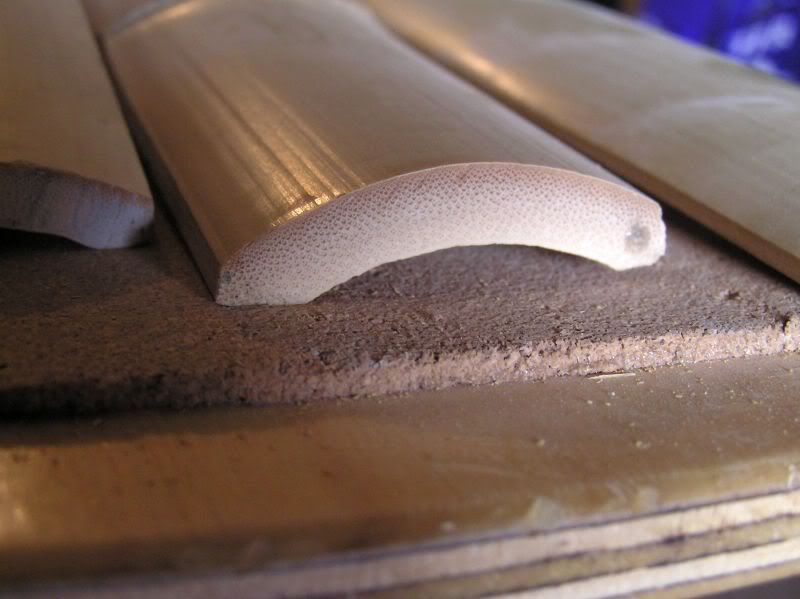 I like to take down the bamboo until the inside is flat. This flat surface we can then trace our pattern on to cut out. Note that if the bamboo is very thin walled, you won't end up with much width to use. The jointer has 3 blades that remove the extra material very fast. Another note, what goes over the jointer stays gone! This is true for fingers as well as bamboo! Use push paddles to push the bamboo over the jointer. Also use ear protection as these are loud! 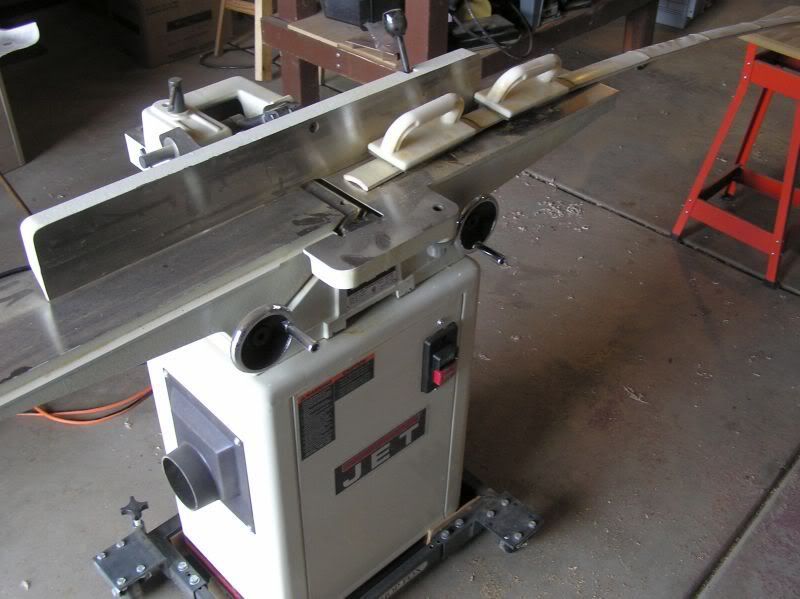 Set the jointer for 1/32 to 1/8 inch - take a pass and make sure you are not taking to much off. You can always take off more, you can not add material back! Every pass on the jointer makes the bamboo more thin, but you will start to loose width as well. 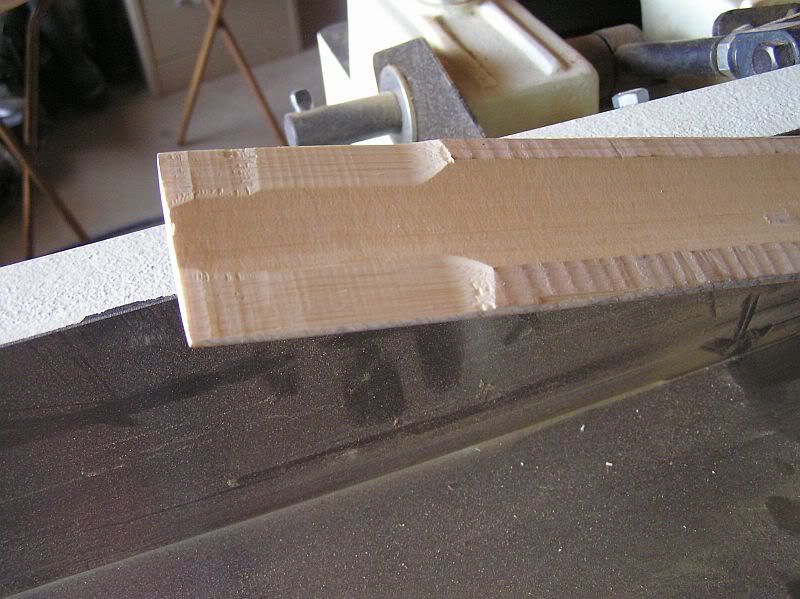 After a couple passes I reduce the amount of cut and just clean them up a bit more than shown below. Save as much width as you can! Also, for those deep looking spots out on the tip - we are going to taper the bamboo from the grip out to the tip. I like it around 0.150 thick mid grip, and about 0.100 out at the tips. Hence, if you have a trouble hole out towards the tip, go ahead and use the jointer to clean that one end up but don't pass the whole section over the jointer - just pass that end. When you get past the trouble point, release on the bamboo and it will rise up off of the jointer. You can give up some width at the tips, and we are going to taper it anyway, right, so you are getting a head start on it! 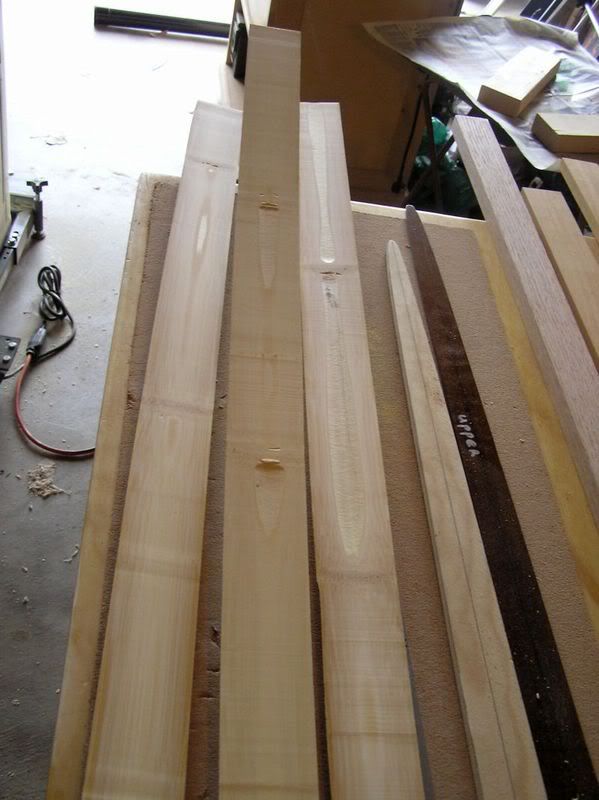 I watch the bamoo edges as I pass it through the jointer. You can see the rind start to chip away - this is when I reduce the amount of cut to 1/32 inch or less per pass. When done, you should have flat and some what thinner bamboo. It is still not thin enough for our use, I will cover that in the next posting. 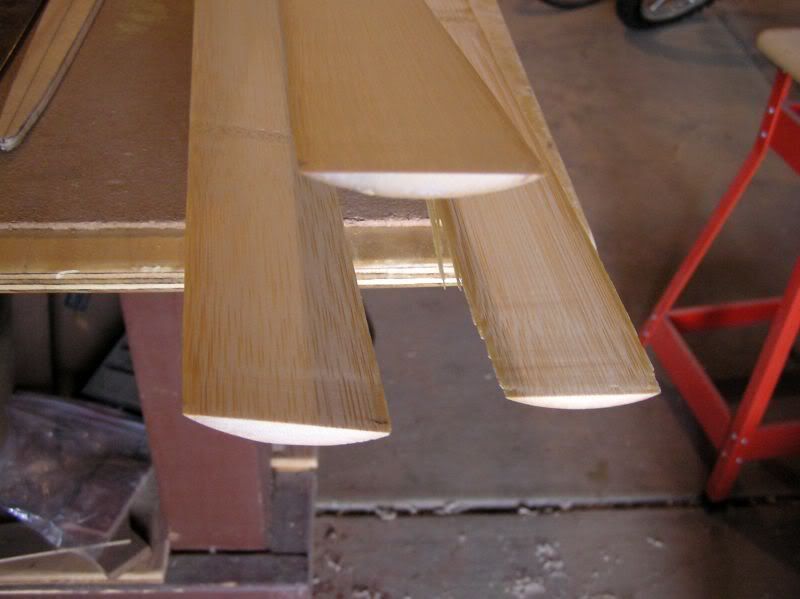 In the photo above, look at the left edge of the lower right bamboo strip... The edge is splintering off - this is why we stop with the jointer at this point and take it down the rest of the way by hand. |
|
red
Forum Guide
 
Posts: 1,501
|
Post by red on Feb 14, 2008 20:38:26 GMT -5
Great information...makes you really appreciate the time and effor that goes into a bow.  |
|
smj
Forum Guide
  Traditional Council
Posts: 1,819
|
Post by smj on Feb 15, 2008 12:32:02 GMT -5
So - once we have the bamboo flat on the inside, we can lay out our pattern. I am going to use a pattern that I made up before with a the shelf cut out for a near center shot. First thing to see how the nodes on the bamboo line up. Nodes are not equally spaced. Those higher on the bamboo are closer together - we want the nodes with greater space between them on the bottom limb. This bow will have a shorter lower limb and a longer upper limb. Again, since each node ends up being a stiff spot in the limb, I want fewer of these in my shorter limb. Next is how do the nodes look along the pattern? Usually you end up with a node in the middle of the bow or on either side of the grip area. For this bow, I elect to go with either side of the grip. 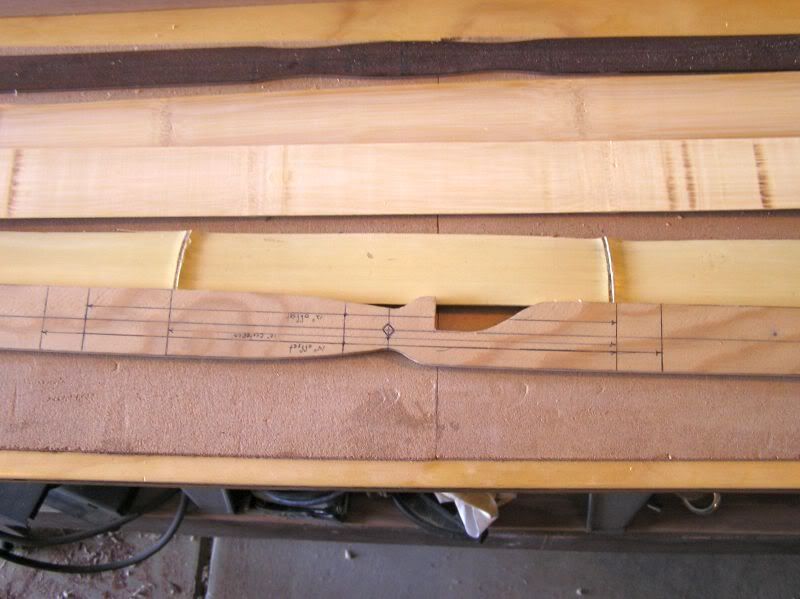 Then we clamp our pattern to the back side of the bamboo - MAKE SURE THE PATTERN IS LOCATED RIGHT FOR THE NODES, AND ALSO FRONT TO BACK... if you get this backward you end up with a bow for a lefty! Since we cut out the shelf, we'd like the shelf to end up on the correct side of the bow... Easier to get backward than you might think! Clamp the pattern to the bamboo so that there is no slip while you trace it out. Before you trace, check to make sure that the pattern is straight, no side flex. It is easy to get a little flex in the pattern when you clamp it up. If you do, then you will have to reduce the bow limbs side to side in order to get the string to track down the middle of the bow when you cut nocks and string it up. Hence, making sure everything is straight is important! I used a couple 2x4 chunks just to get the string above the clamps so it would hang free. 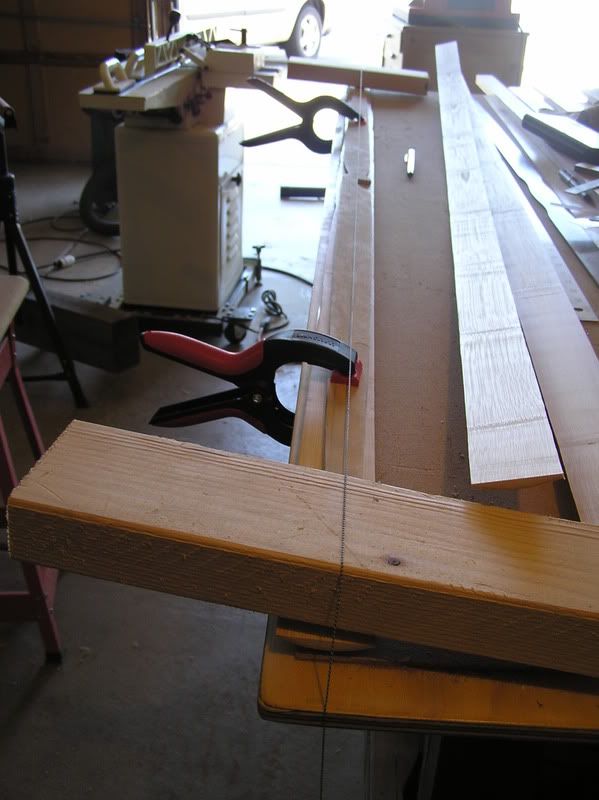 Once traced, you are ready to cut it out and smooth it up. Then we will thin it out and taper it the way we want it. 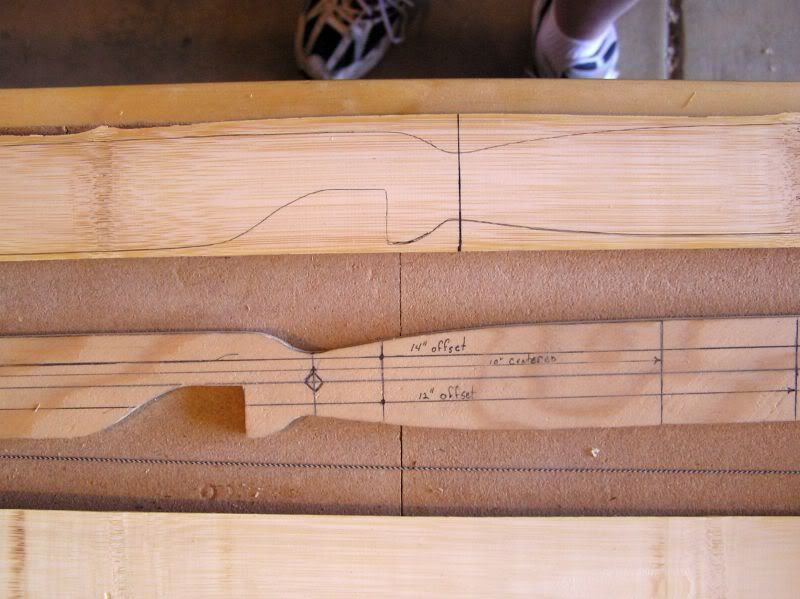 |
|
red
Forum Guide
 
Posts: 1,501
|
Post by red on Feb 16, 2008 10:45:18 GMT -5
Great info. We'll all be bow-building experts by the time you're done....not. You have some real skills. I am just looking forward to the shooting part.  |
|
smj
Forum Guide
  Traditional Council
Posts: 1,819
|
Post by smj on Feb 16, 2008 20:44:04 GMT -5
Yeah, maybe to much details here? The bamboo is, I think, a very important component of having a good shooting bow when you are done. I think it deserves the time here! Let's see if I can finish it up though! So, when we look at the bamboo after roughing out the pattern, it shows a bit over 0.3" thick! I like mine around 0.125", thinner at the tips. 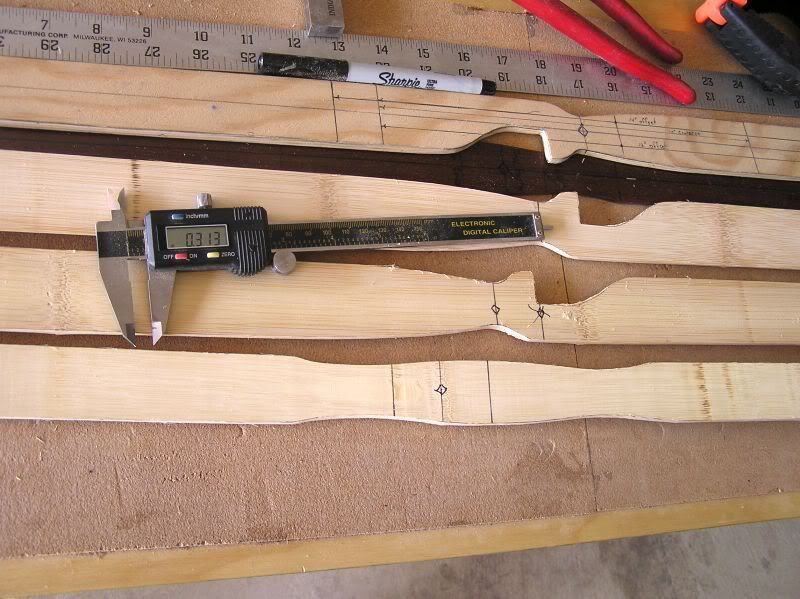 To thin this down, we could go back to the jointer... Although I have seen some chipping at the ends of the tips when you pass over it. So, I am going to use hand tools to take the thickness down. The big guy will take off about 0.012" per pass so it comes off quickly. You use a sander, rasp, just about anything that will remove material. It is a question of control. 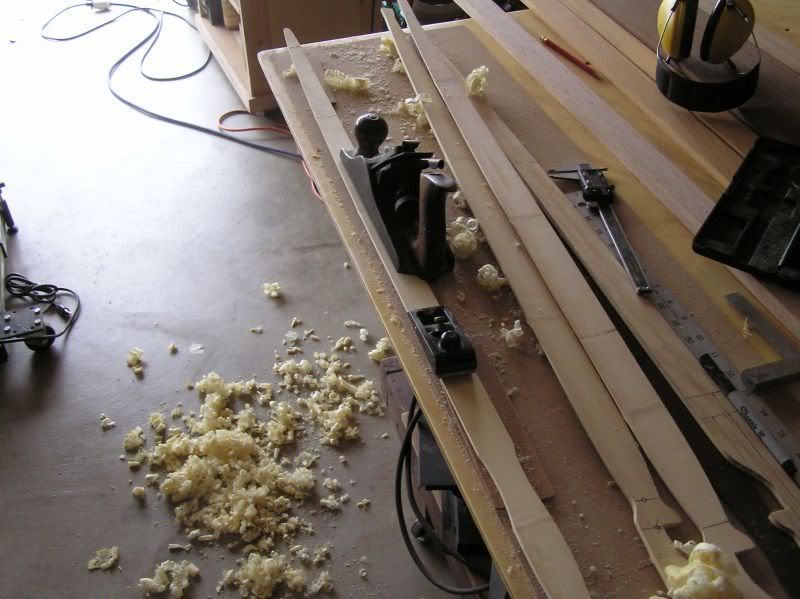 Once done, I have about 0.150" at the grip, and about 0.100 at the tips. In between I have a nice taper going. Between each node the thickness drops by 0.010 or so. All that is left is to run some grooves on the glue side with a hacksaw blade. This really helps the glue joint to hang on to both sides, bamboo and belly stock.  |
|
red
Forum Guide
 
Posts: 1,501
|
Post by red on Feb 17, 2008 10:08:25 GMT -5
Sweet...nice job on the bamboo. I don't think it is too much information for those really trying to learn the craft. How did you learn the thicknesses you like? Trial and error? Does the thickness determine the draw weight or is it more a function of the material? I am guessing a combination of both.  |
|




 Makes me even more excited about my own...you won't have to worry about me sending mine back.


