smj
Forum Guide
  Traditional Council
Posts: 1,819
|
Post by smj on Mar 3, 2007 9:19:11 GMT -5
OK! I seem to be having some issues trying to post today! I've a bunch of stuff to put up, but will do so at a later time as right now the "reply" button goes away after every post I make, I seem to have to log out and back on to get things back to normal! Grrrrr! Later folks!
|
|
smj
Forum Guide
  Traditional Council
Posts: 1,819
|
Post by smj on Mar 3, 2007 15:40:39 GMT -5
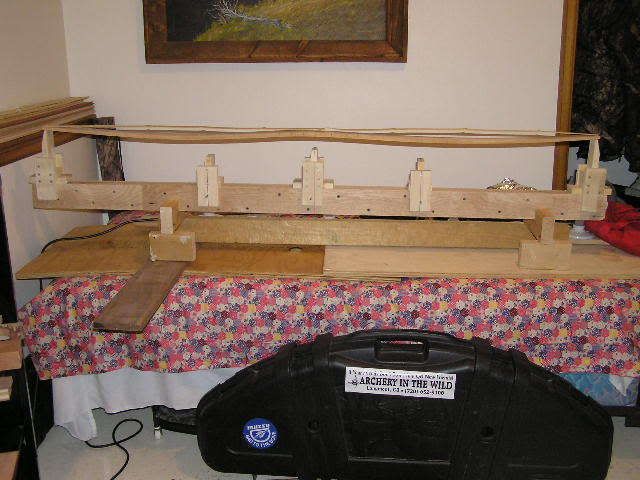 So, here is a shot of the jig I made from the side. As you can see, the center post is one height, mid limb shorter, and the end posts are the tallest. The bow will relax once taken off of the jig, although, if you place a mid layer in the bow, it won't relax back nearly as much. Heights can be what ever you want. The jig is made of three boards to help with warp and any twist that a single board might have or develop. The jig is both glued and screwed together. One edge is then cut on the table saw to give a flat work surface. The standoffs are built to slide on the work surface, and have sides, or skirts, on them to allow them to fit very snug, yet still move back and forth. 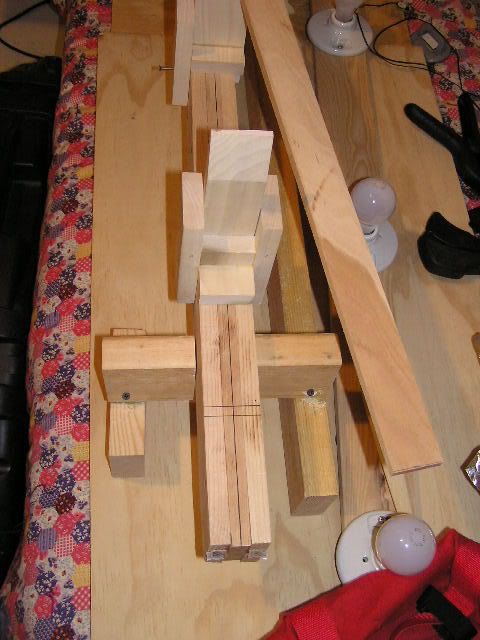 A look at the end of the jig shows the three boards put together, with the center line marked. This was to make sure that the jig was not warped to one side. (A string from end to end and mark with care, then connect the dots!) You can also see a view of the end standoff. 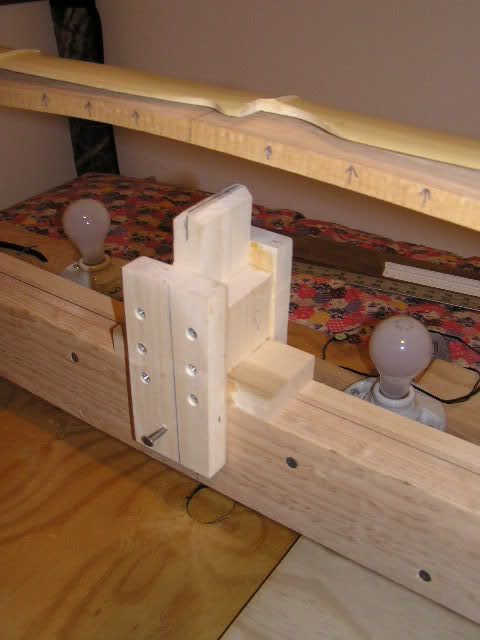 The center block is symmetrically made. The center board that supports the bow is removable, I can change it for another if I wish to change up the amount of R/D for a given bow. Different materials or different purposes for the bow being made can require different amounts of R/D. All the standoffs are made to have removable posts. Note the nail sticking out. I marked the center of the jig and then drilled a hole through the standoff into the jig. I then fit a nail through that hole to hold the standoff in place. Obviously, it pulls out and releases the standoff. 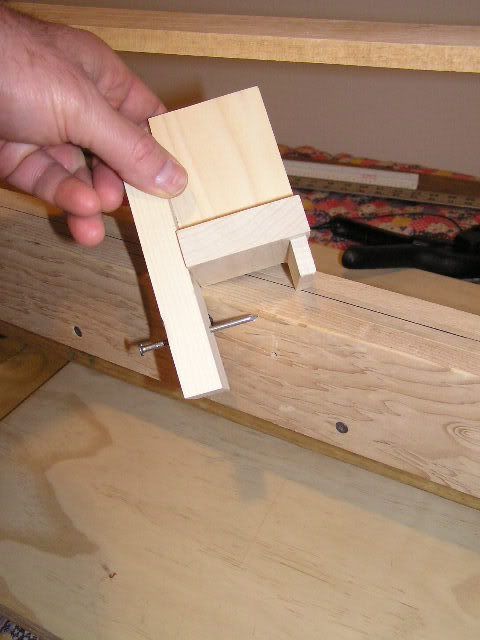 The mid limb standoff I have on angle so you can see it well. I only put a short catch on the far side to keep it on the work surface, there really is no pressure on it I doubt it will ever break off. I did not make this one adjustable, the center support can not be changed. However, you could place another board up against the existing support to gain more height if you wanted. If you look close, you can see the hole in the jig that the nail goes in to hold everything tight. If I were making a purely reflex bow, I’d pull the center standoff off of the jig and run these mid limb standoffs out to the end of the jig, placing the belly of the bow on the work surface. If I wanted more, I’d use the end standoffs which are made adjustable. 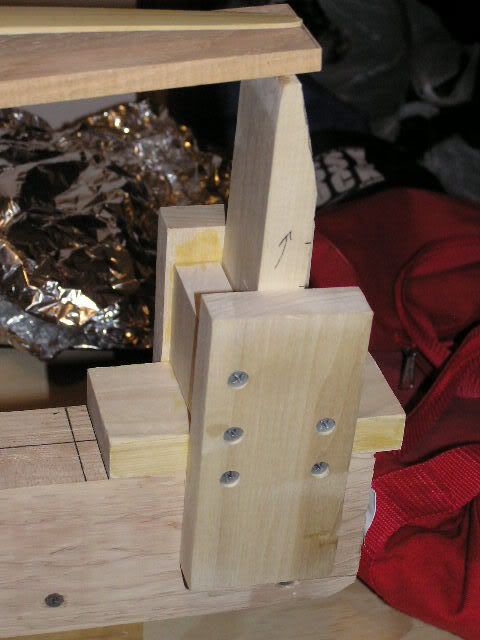 Not sure what’s left to tell here. The end supports are made like the mid support. The standoff sits in a pocket and can be pulled out and replaced with a longer or shorter board. Hence, the housing – or slider part – is made durable. I mark lines across the face of the work surface to show where this part should be at, which depends on bow length. I tap it into position with a light hammer at glue up. I start my glue up without the end supports in place. It seems easier to get the grip section to bend without them. Then pull up the limb tips and place the end blocks underneath after the mid section is secured. Hope this helps, or at least answers a few questions. There are a lot of ways to make one of these, but they sure are flexible with regard to making different bow styles! On to the next thingie... |
|
smj
Forum Guide
  Traditional Council
Posts: 1,819
|
Post by smj on Mar 3, 2007 20:39:15 GMT -5
Hey, by the way... That last photo showing the end support... If you look back at it you will notice that the outside face of the bow end of the support board is cut at an angle. This is to allow one to put a clamp on the very end, or tip, of the limb!
Last, the longer flat board that rides on the work surface is cut longer like that to promote stability. I didn't want these things to rock back and forth!
|
|
|
|
Post by easternhunter on Mar 3, 2007 20:44:06 GMT -5
SMJ - that's a great design with all that flexibility built into it! Thanks for sharing.
Go tmy limb tips on the other day..and glued up a riser extension today too!
Tomorrow, I'll clean it up and see if it's worth gluing on the bow.
Figured I'd save my walnut for a better build and used grainy birch instead...a bit light but it'll match the maple belly better.
Pics to follow in a couple of days.
|
|
smj
Forum Guide
  Traditional Council
Posts: 1,819
|
Post by smj on Mar 10, 2007 20:54:07 GMT -5
SO – I made the statement that I thought I might still get a bow out of ole’ broken-tip… Here it is! Not quite done all the way yet, but in a good spot. What did I do?  OK, I glued the tip back together and then cut off about all of the affected area. I went from a 68 inch bow to a 64.5 inch bow, nock to nock. This has been rather interesting indeed! Here is what the grip looks like right now… 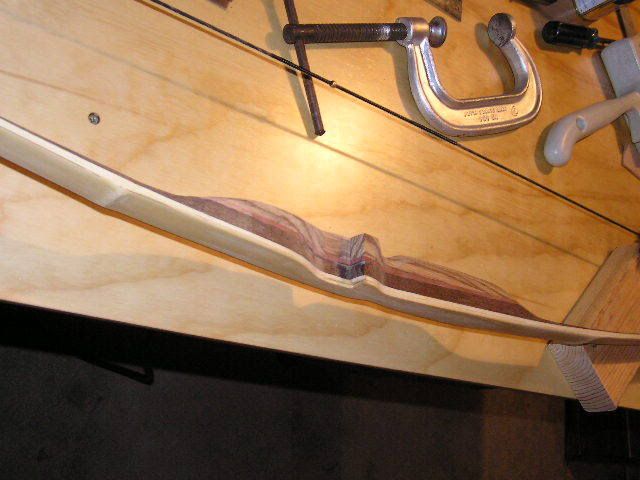 Here is the bow at a 5 inch brace height, 1/8 inch positive tiller… 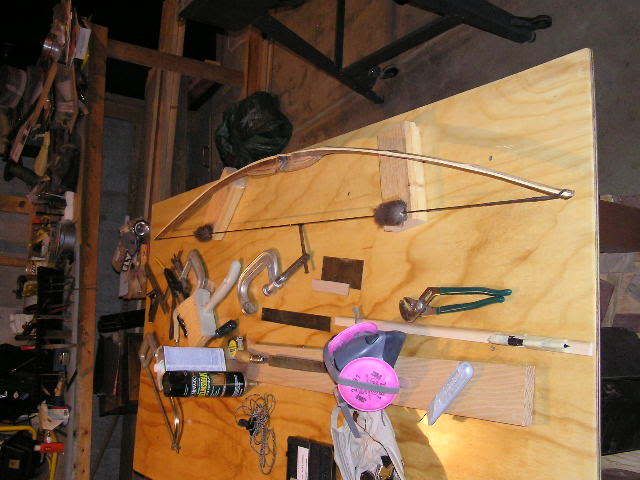 Limb curve looks like this, note the limb stiffens as it comes out toward the tip, no whip tip… 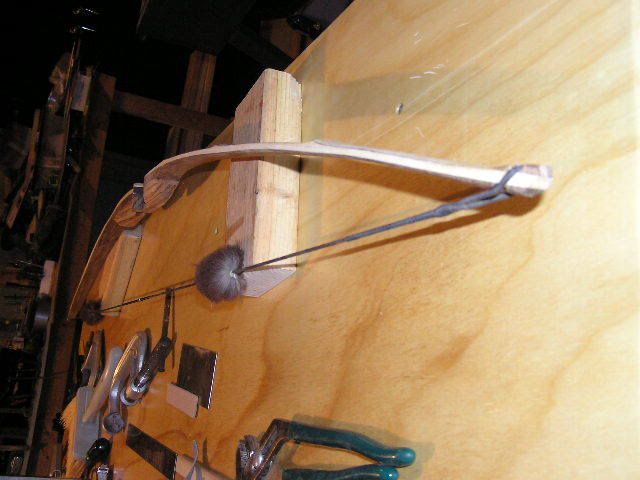 This is what it looks like unstrung on the bench… 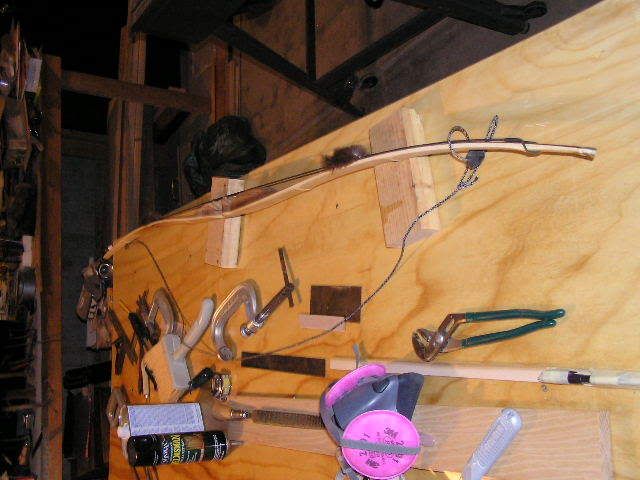 Here’s a couple other points on working bamboo. A small plane works great for final reductions of thickness... 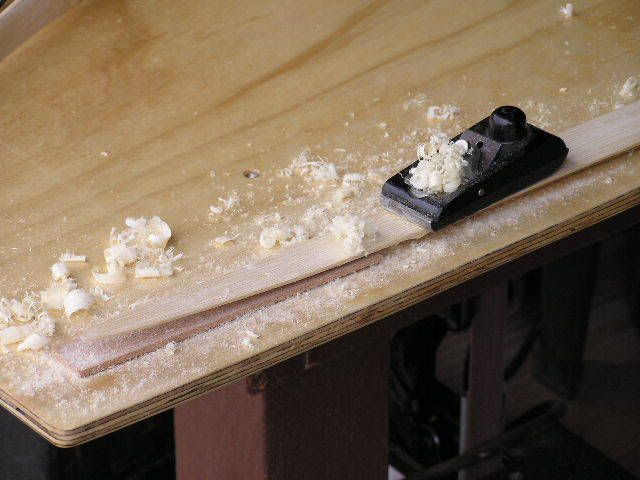 When working bamboo, remember that when you put the bamboo husk side down, the space left due to the nodes has to be filled. If not, it makes it almost impossible to plane the bamboo off flat with an even taper to the tip. Also, if you angle the blade just a tad, you can work the glue surface to be slightly concave. This is a good thing, too! I keep my calipers close while thinning the boo, and make sure I have the taper I want on both limbs. Last, don’t forget to use the hacksaw blade to allow for glue lines to form within the joint. A flat surface has a very high chance of joint failure. There is nothing for the glue to hang on to – AND – when you make an R/D bow, you have to put a lot of pressure on bow to make it bend to your jig. Without all of the above, you squish your glue right out of the joint. Ooooppps! Note the split pieces of cork under the bamboo (For the next bow!): 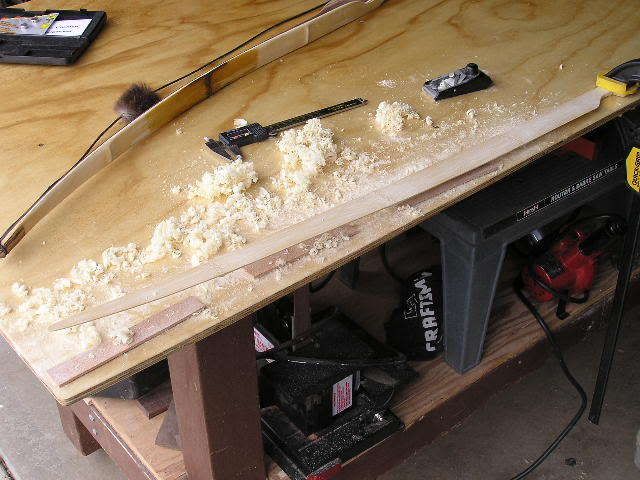 |
|
smj
Forum Guide
  Traditional Council
Posts: 1,819
|
Post by smj on Mar 10, 2007 21:03:10 GMT -5
Hey easternhunter... What's happening with your bow? You've left us all wondering...
For that matter, how about skipmaster1 - did you ever start one yet?
Come on guys, gives us an update!!!
|
|
Coca Cola
Board Regular
 Formerly, upthere.
Posts: 406
|
Post by Coca Cola on Mar 10, 2007 22:55:14 GMT -5
That bow looks great smj. If that is alittle too short send it to me  . Just kiddng Just curious, whats the brace height? |
|
Coca Cola
Board Regular
 Formerly, upthere.
Posts: 406
|
Post by Coca Cola on Mar 10, 2007 22:59:00 GMT -5
. The bow will relax once taken off of the jig, although, if you place a mid layer in the bow, it won't relax back nearly as much. what do you mean, like fast flex boo? Would it be possible to do glass bows with that type of jig using bicycle inner tube method? |
|
smj
Forum Guide
  Traditional Council
Posts: 1,819
|
Post by smj on Mar 11, 2007 0:17:21 GMT -5
Actually, I listed the brace height just under the first photo... As shown, it is braced at about 5 inches - probably at least an inch lower than you'd want to shoot it. I like a lower brace as it is easier on the bow while playing with tiller. At 5 inches, it has 1/8th inch positive tiller. What I mean by placing a mid layer the amount the bow relaxes once off the jig is as follows! The glued surfaces is what holds tension in the limbs. Of course, adding layers adds to the over all stability of the limb, too. The shear force generated between the limbs, due to the glued surfaces, provides the force to hold the shape. Yeah, you can do glass bows in this way, a pal of mine is setting to do just that. However, if you do glass you should consider a different glue. Smooth-on is the glue most bowyer seem to use. My issue with smooth-on is that the glue is typically heated rather warm while drying. Great glue, costs a lot and needs heat. I don't know about the inner tube wrap though. The squeeze clamps would do it though. Smooth-on tends to turn more fluid once warmed, the squeeze clamps keep the tension a bit better, I think, than would the inner tube. Give one a try and let us know how you make out! Take a peek - www.3riversarchery.com/Product.asp?c=6&s=3&p=0&i=4458 |
|
Coca Cola
Board Regular
 Formerly, upthere.
Posts: 406
|
Post by Coca Cola on Mar 11, 2007 9:25:54 GMT -5
I was just thinkin I might possibly think about doing a glass bow this summer. Being in highschool I have a rediculous amount of time for 3 months a year. I thought maybe bowmaking would be a good way to use it. But thats a long way off.
In the event I did a glass bow, to avoid needing a hotbox could I just wait for a really warm day and leave it outside? Seems like it would do the same thing.
So trilam bows usually hold R/d better, correct?
|
|