smj
Forum Guide
  Traditional Council
Posts: 1,819
|
Post by smj on Dec 21, 2006 21:10:19 GMT -5
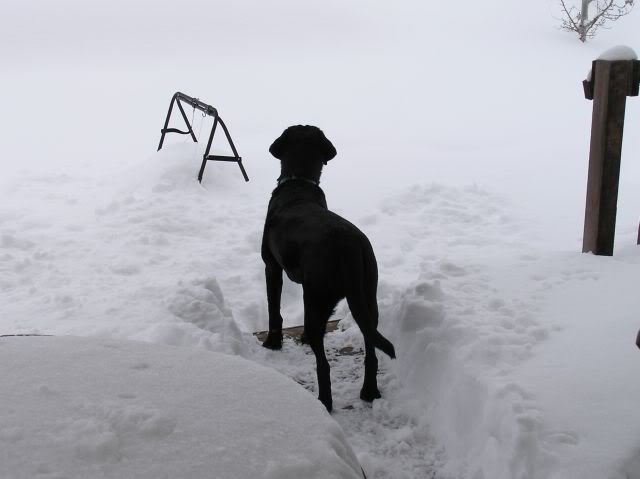 So, I went to shoot a few arrows this morning, only to find that my bag target was not anywhere to be found… Even my dog seemed a bit caught off guard by the amount of snow in the back yard! Hence, my activities today turn to making bows, rather than shooting bows!  This is what I am doing… Shown above, are two pine slat patterns (on the right), an Ipe bow board, and the bamboo backing to be used. If you look close, you will see that the bamboo is cut out after the left most pine pattern board. Also note that if you place your pattern one way, you a bow that you will hold in your left hand. If you flip the pattern over, you will get a bow that must be held in your right hand to shoot. Also note that the pattern is traced on the inside of the bamboo. The outer surface is not flat, and you have the nodes to deal with. It would be very difficult to draw a good pattern on the outside of the bamboo! The bamboo has to be flattened before you can use it. I have another picture that will show this better. (That’s my black lab, Sara, eating the pattern used on the bamboo cutout… 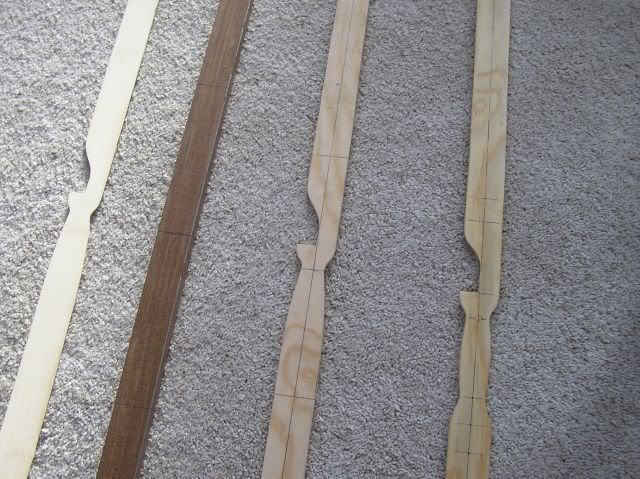 Here is a closer shot of the patterns. Note that I mark points of interest on the pattern: Center line, mid point of the grip, shelf, and grip wood extension. Mark it on the pattern, you can just transfer those marks to backing being used for your bow. Also note that the two patterns have different grips. You can get as fancy as you wish, pine is cheap! You transfer the pattern to the backing being used so that once glue up is done, you can just cut out the shape of your bow – no fussing around! Last, you can just see the center mark on the Ipe bow board… You will need to know this so that you can line up the backing and belly board and later, the grip wood. Please ask questions if something does not seem straight forward to you! 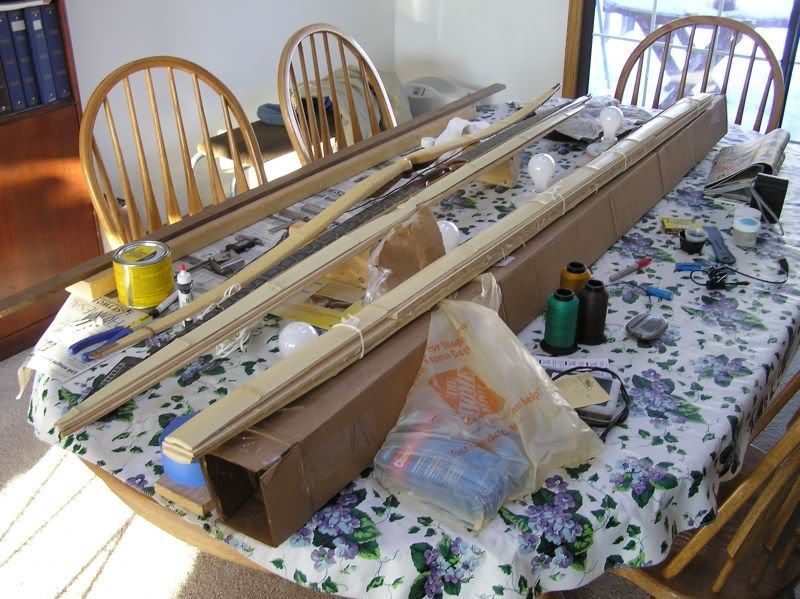 This is a messy shot… Still, lots to see here! On the cardboard box, are new materials. When you order them out, they come in a nice cardboard box all tied together. They are a couple of bamboo backings, and a hickory and a maple slat to back, or make for mid limb materials, for two other bows - nothing very fancy. To the right of the box, you will see the spools of B-50 string for making bow strings. Middle table, there are three bows: to right the bamboo backing to be used on top of the pine pattern boards, middle is a flat bow made with a fake snake skin backing, to the left a hickory/bamboo reflex/deflex longbow. The far left of the table is the Ipe board we will be using - sitting upon a plain old chunk of 2x4. Let’s see, you will notice the 4 light bulbs mounted to a board, about the length of the longbows on the table. When the bow in the jig, yet to be presented, I have a frame I put over the bow and jig that will allow me to put a couple of sheets over the whole affair. Inside this little tent, I place the light bulbs, and turn them on. Depending on ambient temperature, I turn on fewer or all of them. In the winter, we keep the house around 68 degrees F. At that ambient temperature, with all 4 lights on, I get a steady temperature of 79.7 degrees F… Just about perfect! If you get it above 80, you run a risk of having the glue crystallize on you. Keep it to cool, and it can take for ever to cure! The first time I used the epoxy from Rudderbows, I didn’t put the bow in a nice warm container… 24 hours latter, the glue was still wet! 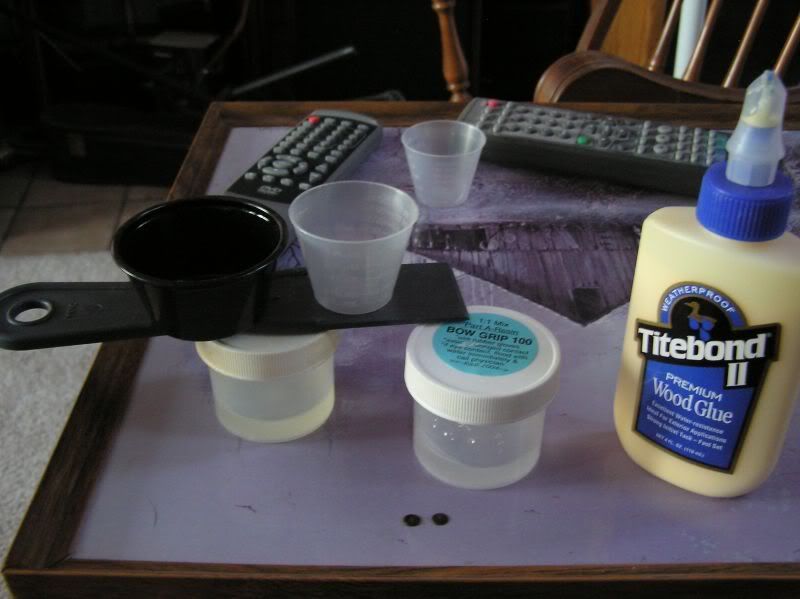 A moment on glue… To glue any flexing parts of the bow, you need a very good glue. The glue I have been using so far, is called Bow Grip, and is sold through Rudderbows. I don’t know what the actual brand name of the glue is, only what Rudderbows sells it as. You get a lot of work time with this glue, takes 12 hours to cure at 80 degrees F. To mix the glue, it is a 2 part epoxy, you need to use it 50/50, equal parts. I use the clear cup that has markings on it to indicate quantity. I mix the stuff in the black cup as completely as possible. I like to keep the measuring and mixing cups separate. If you need to pour some back in the container, make sure you don’t mix containers! The Part A and Part B look almost alike. To spread it out, I like a 1 inch solvent proof polymer putty knife. (It cleans up with ease.) The Titebond works great for parts of the bow that do not flex. There are several types of Titebond out there, get the waterproof one. 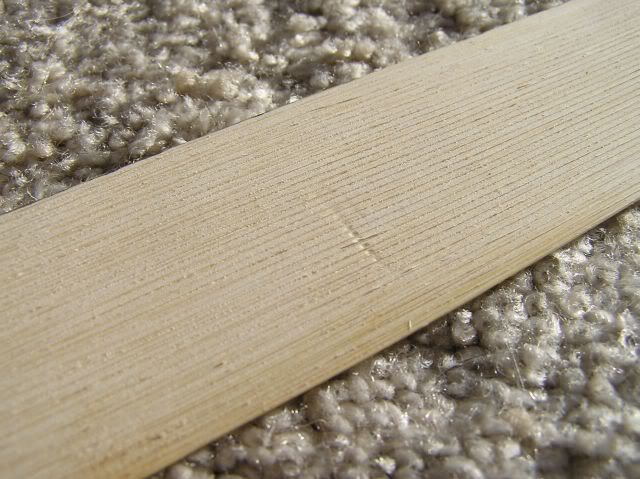 It might be a bit hard to see in this photo, but in order to get good glue lines or simply a good glue up, every glue surface gets special treatment. I use a hacksaw blade that I run up and down every glue surface until small grooves appear. A toothing plane is what would be used if you happen to have one. These tools are expensive though, and hacksaw blades are cheap! Clamp the bow board or bamboo backing or what ever to be glued and grip the hacksaw blade with a bit of curve to it. (I’ll post a picture later.) This curvature allows you to really get a nicely treated surface, like the one above. I have not had a bad glue job yet… Keep in mind that you have to do this to every surface that is to be glued. Also, when you spread the glue, leave no surface dry! This means spread the glue on every surface to be glued. Hence, both surfaces to be joined must be glued. 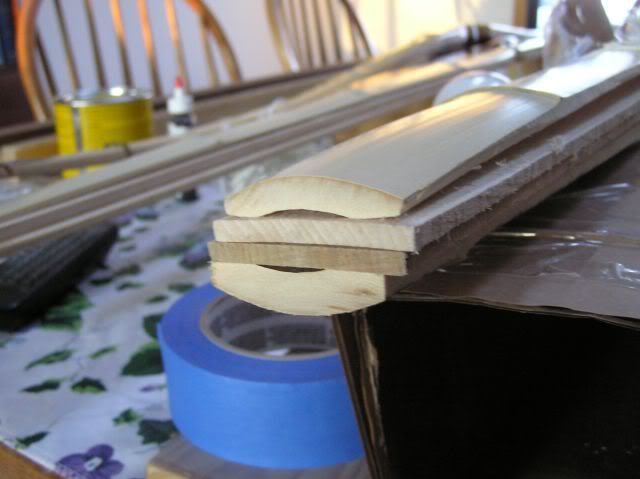 This what non-flattened bamboo is like when you order it from a bowyers supply house. There is an outer curvature, and also an inner curvature. Hence, the bamboo must be flattened out, and thinned, and shaped in general to use it. There are a couple of ways to do this: 60 grit sanding belt on a sander, rough it out with a bandsaw, or flatten in with the use of a jointer. I do a couple of things… 1 – Flatten it with a jointer. 2 – Trace pattern on the inside surface that is now flat 3 - Then use a belt sander to taper the thickness out to the tip The bamboo should be around an 1/8 inch thick along it’s length. At the grip it can be the most thick, however, as you go out to the tips it should taper to a thinner thickness. I don’t really have a measurement, I just eyeball it. Still, my current bamboo pattern I’ve cut out, is 0.160 thick at the center line of the bow, 0.057 at the tip end. Here is a pic of the current pattern tip: 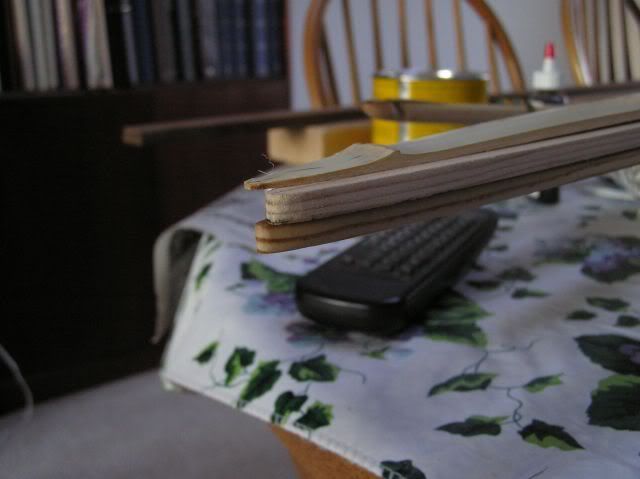 As you can see in the photo, the bamboo is sitting on top of the pine slat patterns. I take swipes at it with the sander until I get a nice taper. Then I use the hacksaw to put the “glue lines” in to the inner side of the bamboo piece. I had already done the steps shown on the bow I am building, and didn’t take pictures as I went. SO – I will have to take them with the next one and post them as I get them. That’s it for now! (By the way, I might not always get the order of things to perfection, but I will try to cover everything along the way!) |
|
|
|
Post by BT on Dec 21, 2006 21:54:29 GMT -5
NIce Pics! .... VERY NICE! Easy to learn when you can see what your talking about  |
|
FlyinCedar
Junior Member
 Takin a break on patrol
Posts: 280
|
Post by FlyinCedar on Dec 23, 2006 0:19:22 GMT -5
Hey smj...check out the measuring syringes from Rudderbows....I too use the Bowgrip, and the syringes are great.
|
|
smj
Forum Guide
  Traditional Council
Posts: 1,819
|
Post by smj on Dec 23, 2006 0:35:00 GMT -5
I have everything ready to do a glue up... But not tonight! This has turned in to a spare time event. My wife has a nasty cold so I've had some things to catch up on for her around here. Still, I'll post some more pics once I get this puppy on the jig, and have a chance to type out what I think I want to say. Tomorrow I am skiing with my oldest daughter, so I am not sure what I will get done. Have to see what time we get back!
I looked at the syringes from Rudderbows - but didn't go for them. I had the little measures already and just started to use them. I do like the idea of the syringe though! Seems like a niffty system.
|
|
smj
Forum Guide
  Traditional Council
Posts: 1,819
|
Post by smj on Dec 24, 2006 10:44:34 GMT -5
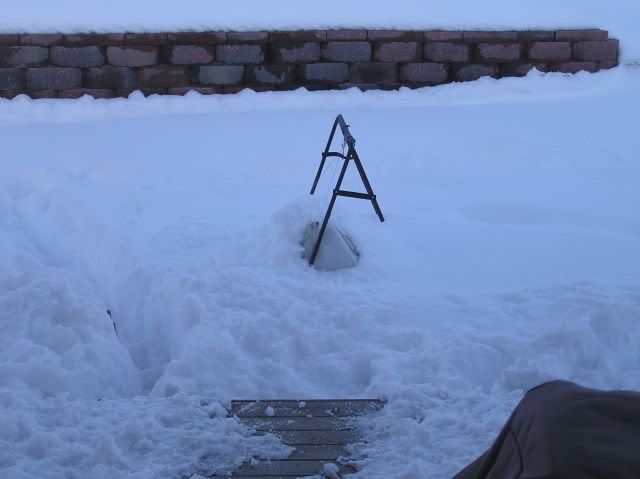 Well, as you can see, by the time I am done with this bow I might be able to see enough of my target to start shooting again! Skiing was great yesterday, got a little time to work on the bow, too! 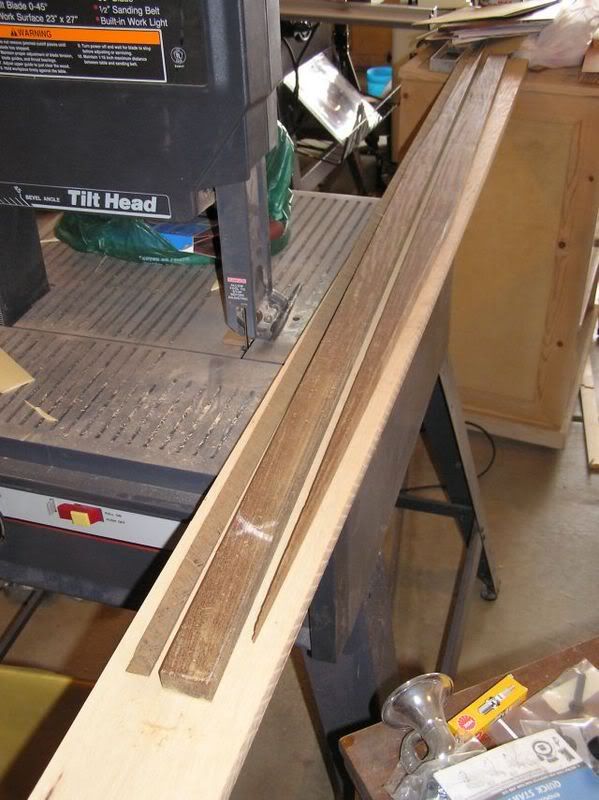 Here is a look at the remains of the Ipe board I cut up. The grain ran from the lower right corner to the upper left corner. So, I had to cut the board at an angle to get the grain to run roughly down the cut that I wanted to make a bow out of. The two long pieces laying there will get cut in the middle and joined to make an additional bow. I got two 1.5 inch bow boards out of it to start with for a total of 3 bow boards from one Ipe plank. I think the cost was around $18. To rip the board, I clamped it to my work bench and used a skill saw. Of course, you have to also clamp a guide board to the table so that the skill saw goes where you want it to go. (The band saw just happened to be there at the time of the photo!) So, time to get the glue up going! To make a flat bow, no reflex or deflex, you can still use a pattern for the backing if you want. Or you could just thin the bamboo and glue it to the board you want to use for belly stock. Your pattern can be drawn on the belly side of the bow board since it is flat. The clamping and glue application would be the same as here. Some use a different means to hold the parts while they dry: squeeze clamps, wrap them with an elastic material, a fancy pneumatic press… I use squeeze clamps. They don’t cost a whole lot, and seem to work well. 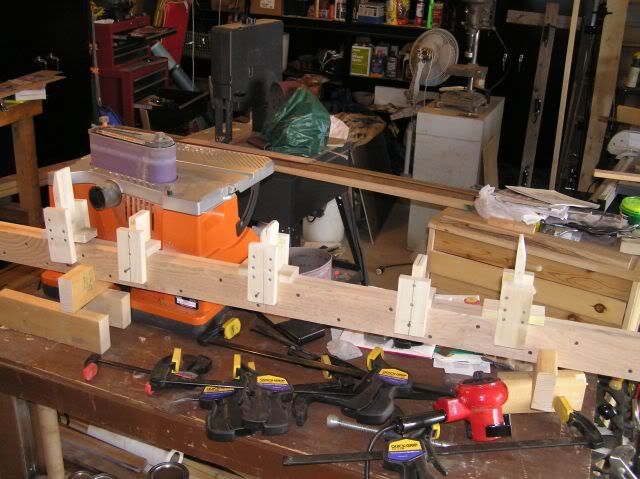 Here is the jig I use for glue up. You can see that once the board is bent over this jig, it will have to display some nice curves! Now, if you want to the boards new curves to have the best shape possible, you need to apply some taper to the limbs. The center is 4 inches, mid limb points 2 7/8 inches, under the tips is 6 inches. On this bow, the limbs are the same length (they shoot great…) so the mid points are set at 12 5/8 inch from the center line (the tips are not set in the right spots in the pictures above.) 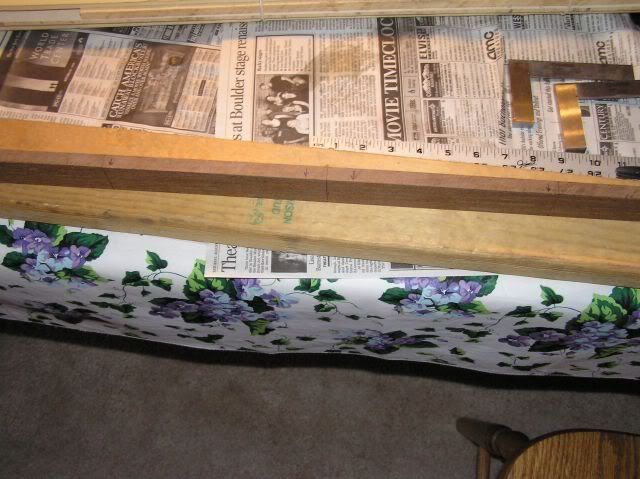 If you are going to cut a taper in to the stock, you need to keep track of which side is which of the bow. I mark the sides to show which is the backing side and which is the belly side. 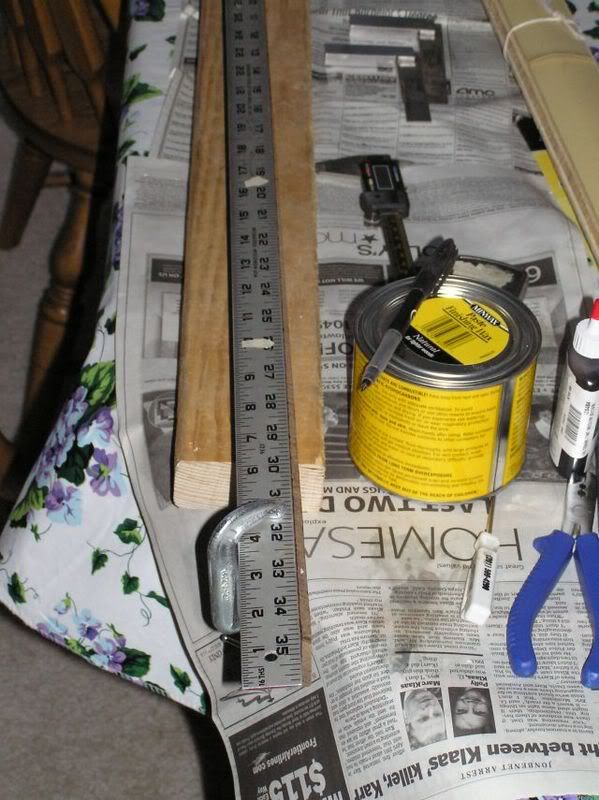 Once you know which side is which, I like to mark a taper on the sides of the limbs, just so that I can eyeball status quickly. You can take this off with a hand plane, rasp, band saw, jointer, or table saw. You just want to rough the shape, the taper allows the limbs to flex nicely in the jig. 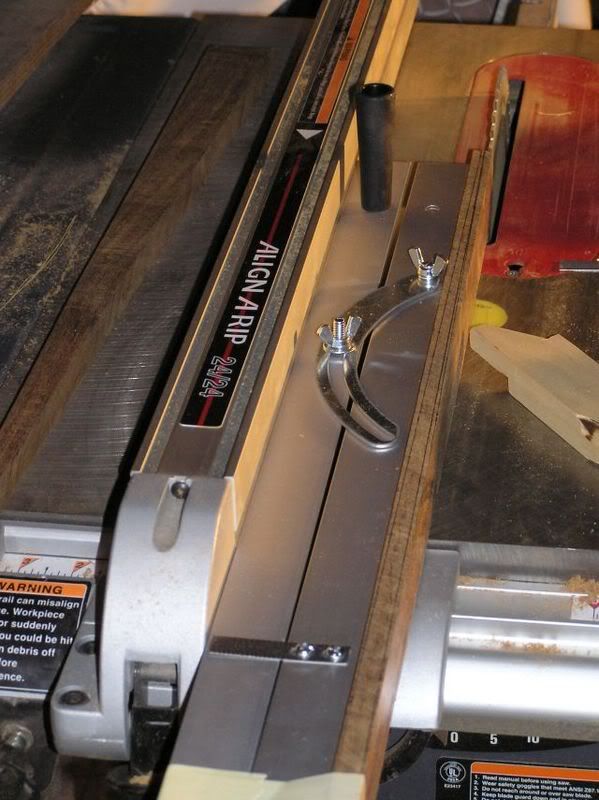 This time around I choose to try a nifty guide affair on the table saw. Don’t do it this way! Or if you do, make your own guide. This one does not hold the bow board parallel to the table saw blade. Left me with a lot of touch up sanding to be done (with a belt sander) to get things shaped right. The jointer is still probably the least amount of work for putting a taper on your limbs, although I think you could make a very workable guide for the table saw out of wood. 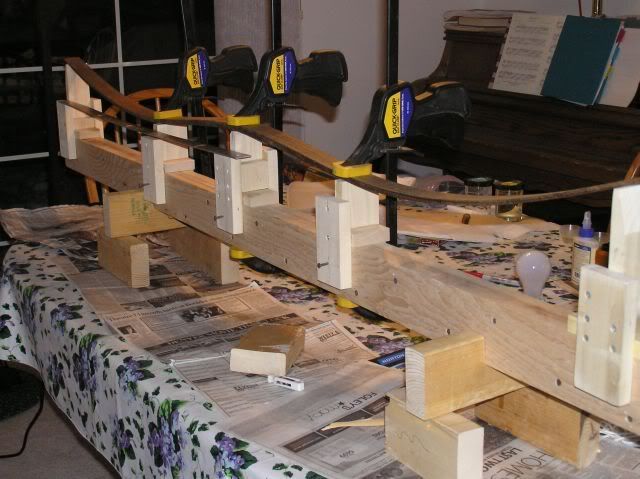 So you always want to do a dry run prior to every glue up. This time around, I got the Ipe on the jig and had some troubles… The first board on the jig was to thick, around 0.7 inches at the grip section. When I tried to wrap it on to the jig, requiring all 250 pounds of me to do so, I developed a crack in the Ipe! Ahhhhh! OK, the next board was cut down to 0.454 at the grip, with a taper to 0.250 at the tips. This is more taper than I normally put on the limb, usually at 1/8 inch, but since I’ve not worked with Ipe before I am using recommendations from someone else. We will have to see what we end up with. The grip section was left at 14 inches, 7 inches either side of the center line. I plan to add a 12.5 inch zebra wood grip, and a 13 inch piece of thin white oak. This leaves a half inch either side of the grip area to ensure that no hinges develop right off of the grip. (We will talk about hinges and stiff spots when we get there.) Anyway, you can see above the second board in the jig. Ipe is strong, stiff, wood! The thinner board went on OK, but the clamp I was trying to use would not hold the board down on the jig once I put the end pieces on under the tips! 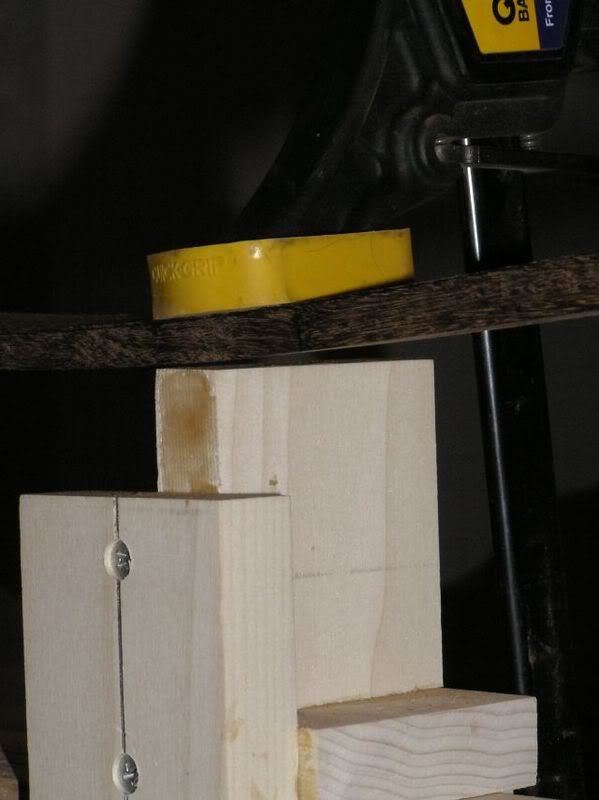 You can see how the board comes up from the mid limb set point! With hickory, I was able to use a heat gun to pre-bend the board to the jig prior to glue up. This made putting it all on the jig much easier, as I didn’t have to clamp the stack up all that hard to get it all on the jig. Ipe, however, didn’t seem to want to hold a bend after heating. Hence, I needed another clamp! I put this board in the jig, left it clamped a while and heated it. Took it out, the board went straight flat again! WOW! 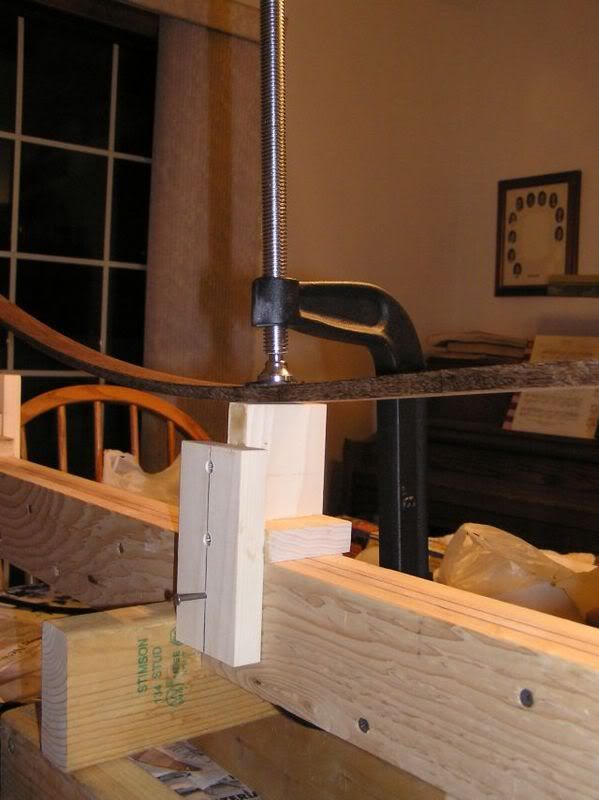 So, I bought some 8 inch C clamps to help me out here! They seem to work a lot better. 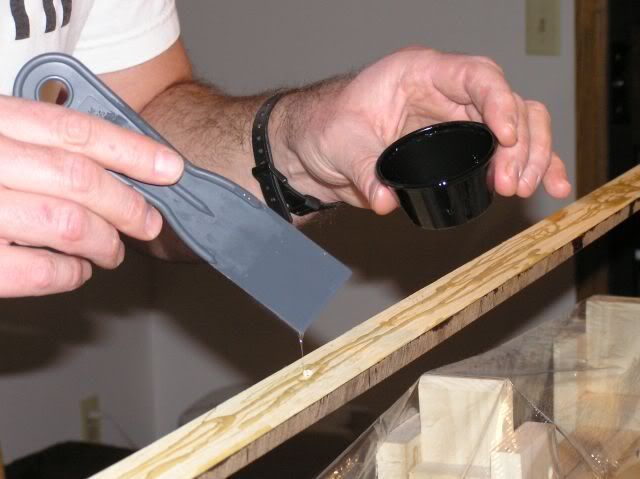 So, mix up the glue and put it on! 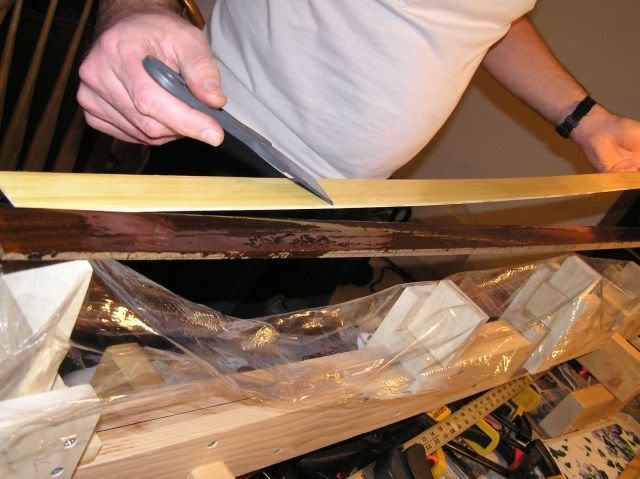 Make sure you get all surfaces to be glued together wet with glue before you put them together. This helps to get rid of dry spots. Dry spots are bad! The limbs come apart if you leave dry spots during the glue up, which would make you cry. (Cry very hard, and loud.) I don’t spare glue either. You can see the plastic wrap under the bow board. This is to catch the extra glue that will squeeze out of the layers once you apply pressure. It helps to keep the jig from getting caked in glue! 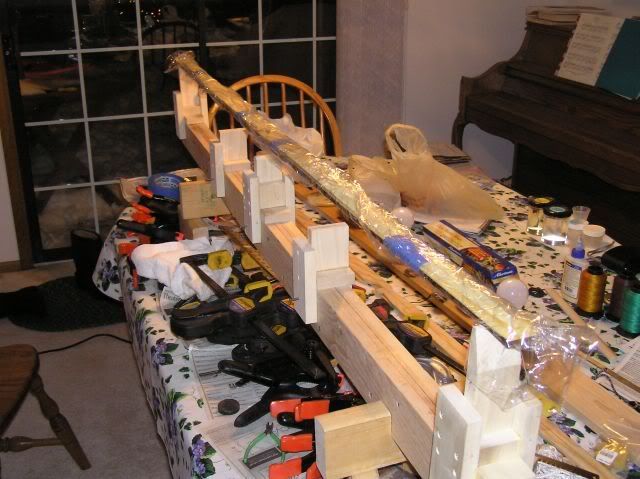 So, once all of the surfaces are glued and stacked, I wrap some tape around them to hold them all somewhat in place and then pull the plastic up around them. I try to be neat about it. The extra glue and plastic will come right off afterwards and is not a problem. 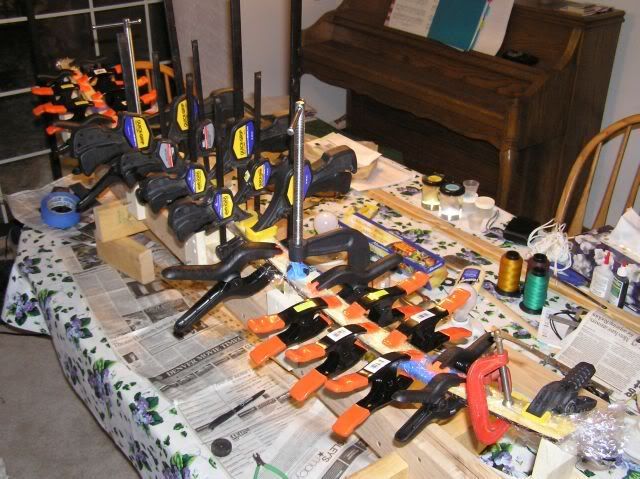 This is what it looks like with once all glued, in the jig, with the clamps put on. 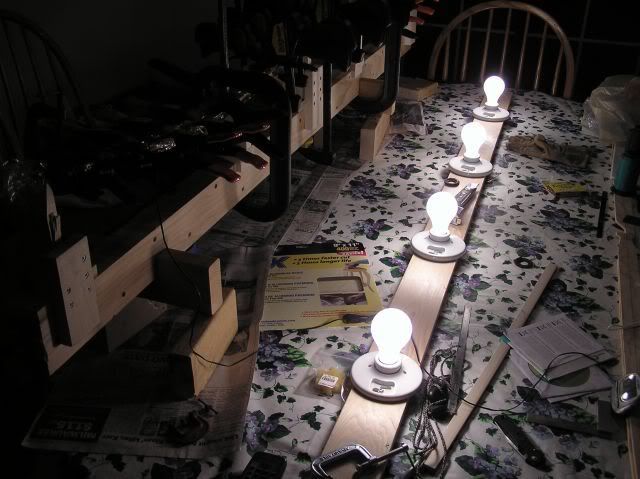 The glue is supposed to be kept at 80 degrees F during curing. Around my house in the winter it is more like 68! So, I need to warm it up a bit. I use four 40 watt light bulbs to do this. 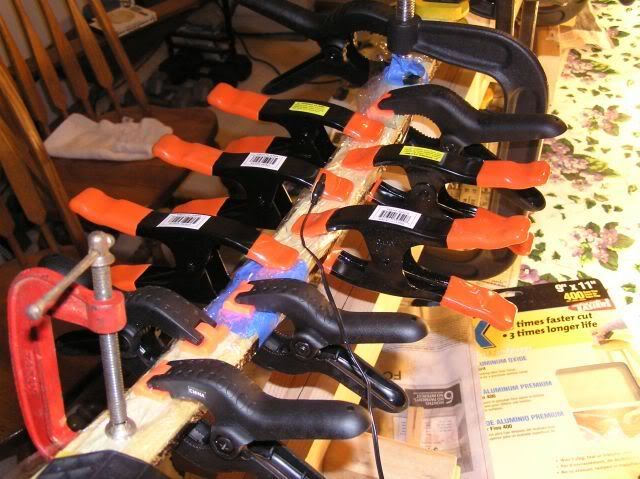 I keep track of the temperature with a cheap digital indoor/outdoor thermometer from one of the Mart stores. Works well, too. I move the sensor to the edge of the limb towards the light bulb. I found that the temp was more like 84 along the edge of the limb… So I got my trusty roll of tin foil from my wife and put a deflector in between the light bulb on the bow. This seemed to make everything happy temperature wise! 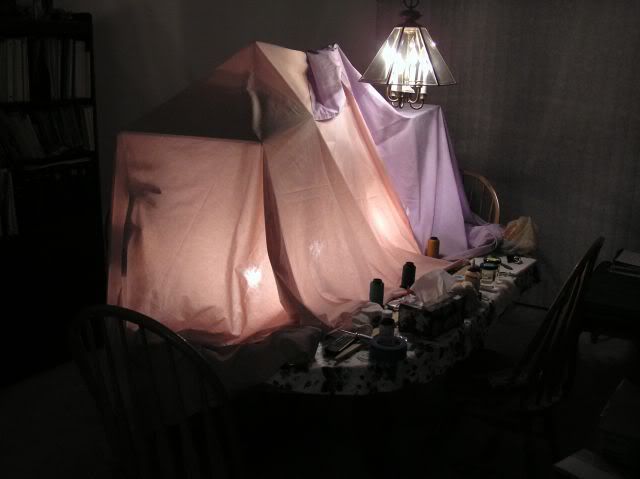 To keep my heat around the bow, I put a couple old sheets over the top. Kind of a tent for the new bow while cures. 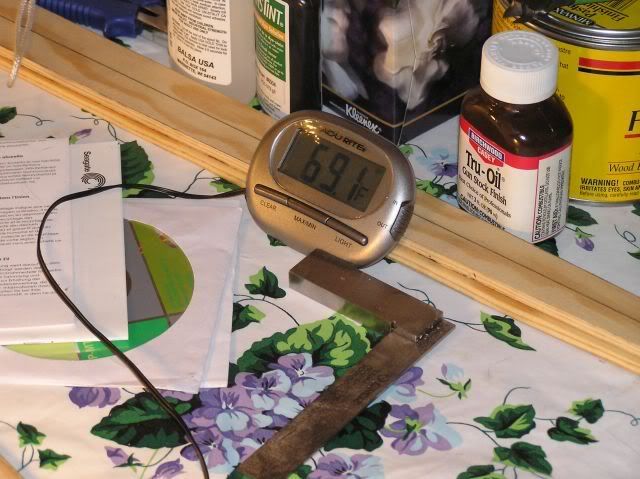 So, the starting temp is ambient in the house… 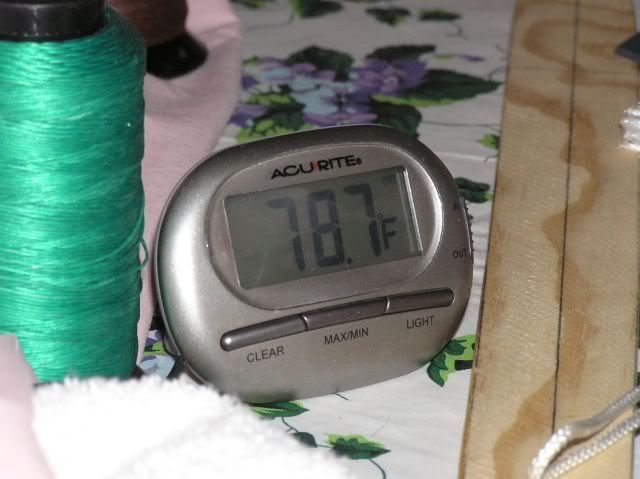 But we end up at a much better temperature after about an hour. A word of caution, as the ambient of the house changes, so does your temperature. During the day, when the house gets some sunshine in the windows you will need to either open up the tent a bit, or turn out a couple light bulbs. Otherwise, the temperature could get well over 80 and that could be very bad for the glue – it can crystallize on you and not hold. If the temperature is below 80, you are supposed to just allow for more cure time. I tried one at 68 one time and after a day the glue was still wet. I don’t like waiting so long… When you decide to show someone how to do something, it seems like everything that can go wrong will do so. As I said above, the first bow board I tried with Ipe cracked on me while fitting it to the jig. The second one has had issues as well. The C clamps do not like plastic wrap. One of them slid off the limb after being in place for a half hour! The glue has a long work time, and the temperature was way cool, so I clamped it back in place and we’ll have to see how this comes out. SO – next time I will remove the plastic wrap out from under those C clamps at the mid limb point so they are not so slick! Also, with C clamps, you need to put something between the bamboo and the metal clamp so that the bamboo is not damaged during the glue up. I put rubber washers between the boo and clamp. Whether or not this bow turns out great, the process of it all is the same. We will have to wait until after Christmas to find out what we have here. Merry Christmas everyone! (I'd better get back to mine!) |
|
|
|
Post by BT on Dec 26, 2006 21:00:02 GMT -5
Wow! How well this has come along!! Thanks so much smj  There is really alot going into this  What is the estimated cost of getting yourself set up properly to do this type of construction? |
|
smj
Forum Guide
  Traditional Council
Posts: 1,819
|
Post by smj on Dec 28, 2006 10:46:24 GMT -5
I've been out of town for a couple days, so I will now try to get back to this!
As to cost of set up... I don't know! This has been a hobby for me, and I have slowly gotten the stuff I needed. I'll see if I can answer that question eventually... As to the book I seem to be writing up - I have a lot of folks who want to drop by and build a bow with me. I am doing this so that they have something to thumb through before they start, and thought I'd share the rough draft with you guys! (Although you get it without much editing... Sorry!)
At this point, I think I will drop away from what I do when making a bow and look at how Howard Hill roughed out one of his bows. (As stated by Hill in his book Hunting the Hard Way.)
Hill says that the only tools you need are (page 98, Hunting the Hard Way):
1 - Block plane or jack plane
1 - drawing knife
1 - spokeshave
1 - double-edge scraper
1 - 6-inch rattail file
1 - 12 or 14 inch half=round bastard file
1 - 4 inch vise
1 - 6 inch C clamp
The stock he started with was a 72 inch, 1.5 to 1.25 square stave, with a flat or quartering grain. The stave should be straight, although you can use one that is bent but have to keep in mind that you will have to work with the curve of the stave. (Don’t do this for a first bow!) This was to make an unbacked bow, whether from a limb or a board.
The ultimate length of the bow was determined by arrow length. You started with a 72 inch bow to shoot an arrow of 28 inch length. If the arrow length changed from 28 inches, you were to double the amount of the change and add or subtract it to the bow length. A 27 inch arrow required a 70 inch bow. Howard says that you should never shoot an arrow over 28 inches in length. However, this was because if was very difficult to find a wood arrow that would spine right for the heavy draw weights Hill shot! These days, given carbon arrows, this issue is not what it was!
If the wood had any natural reflex, select that concave side as the back of the bow, providing that the grain is correct. Mark the center line around the middle of the stave (the balance point of the stave if the wood density were equal for the length of the stave). Next mark two more lines around the stave; one 3 inches to the left of the center line, another to the right of the center line 1¼ inches. Then you must also mark the center line down the middle of the back of the stave from tip to tip. This gives you 4¼ inches for the grip, the rest for limbs. The lower limb is to the 3 inch side, the top limb is to the 1¼ side. Next, we need to define the limb taper. Looking down at the back of the bow, from the corner of the area defined as the grip section, the limb will start a nice taper from both sides out to the tip, the tip width being left at a quarter inch either side of the center line. This leaves a half inch wide tip. From the side view, the back remains flat, no taper. From the belly side, the limb starts to taper at the corner of the grip and proceeds to the tip within a half inch of the back. So, the tip of the limbs is now a half inch square. From here, you floor tiller the limbs, cut in the nocks, then finish the tiller. To mark your lines a long straight edge is very handy, however, a string can be used. Mark points on the stave to indicate where your line has to go, stretch a string between the dots, mark with great care along the string with a good fine point pen. If this seems a bit confusing, draw it out on a paper! At this point, I quote from Howard “ It must be understood that the remaining work necessary to complete the bow will have to be done carefully and that the workmanship cannot be guided by given dimensions, but will have to use some of his own judgment.” (Page 104, Hunting the Hard Way) Of course, he give a few more details than I do here, but I just wanted to give you a flavor of how Hill thought a bow should be made. I change from this in that I add an elliptical outline patterned backing and add in reflex/deflex. I do not do recurve.
I'll have more on my bow, probably tomorrow. We are in for another couple feet of snow, so I should be here!
|
|
|
|
Post by BT on Dec 28, 2006 17:10:09 GMT -5
I wish I had more time to read Howards writings. But thanks for the excerpt ..... didn't know about sizing a bow in that regard. When it comes to this..... I am about as green as you'll likely find  |
|
smj
Forum Guide
  Traditional Council
Posts: 1,819
|
Post by smj on Dec 29, 2006 1:13:58 GMT -5
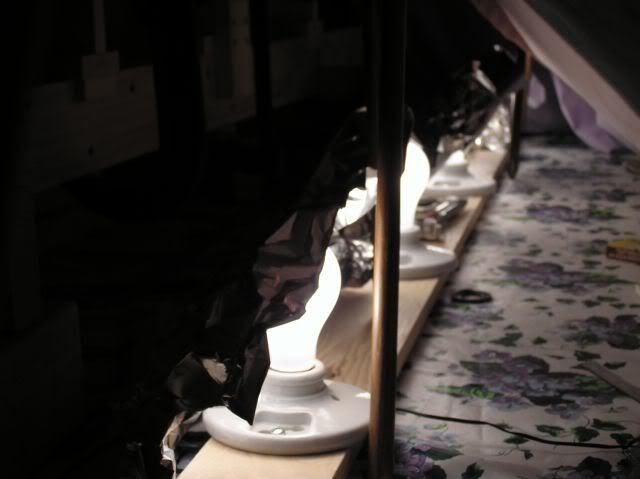 So, I found that to get a more general heat under the tent I had to interrupt the heat coming from the light bulbs. Hence I added some tinfoil deflectors. They seemed to work really well. 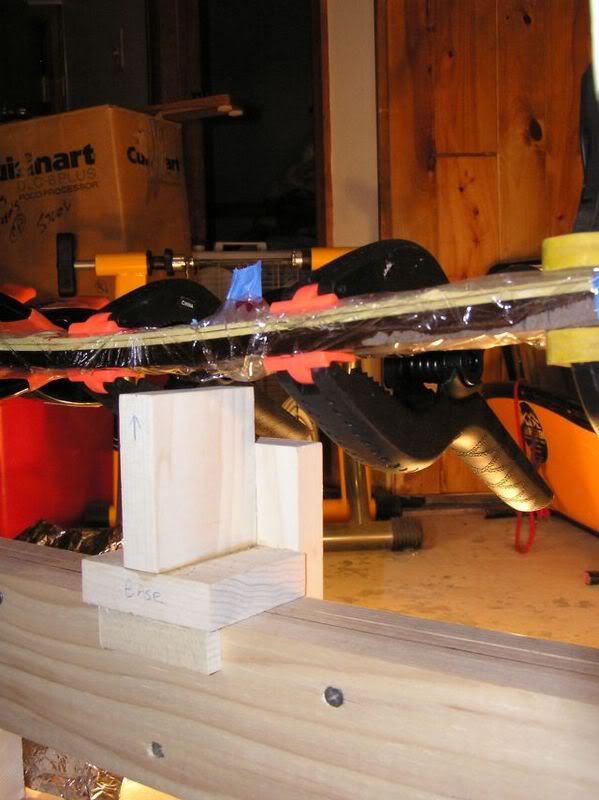 Once the clamps holding the bow to the jig form are released, you will see some relaxing of the wood and a bit of a gap will appear between the mid-limb standoff and the limb. 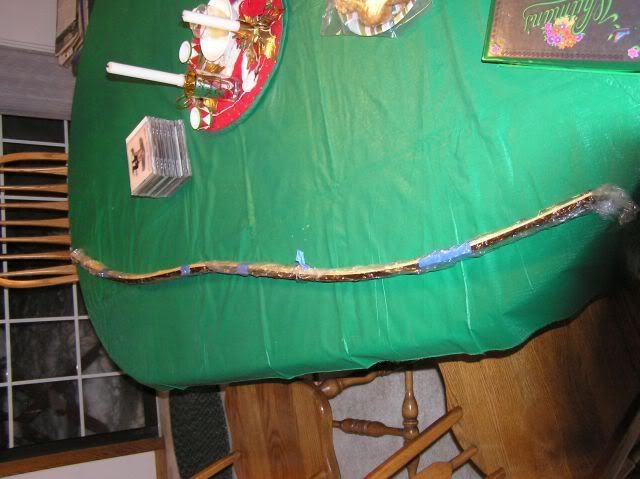 Remove the rest of the clamps, and you are ready to start the cleanup. First remove the plastic wrap. 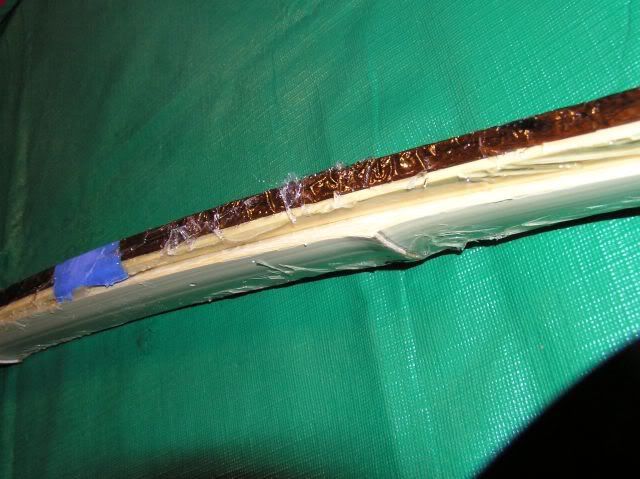 You will find that the glue gets all over everything! This is OK, you have to remove the rind from the bamboo and shape the rest of the bow anyway. But the effect can be interesting the first time you go through it! This was mid-limb once the wrap was off. The plastic looking stuff is glue, and some plastic that didn’t peel off right away. 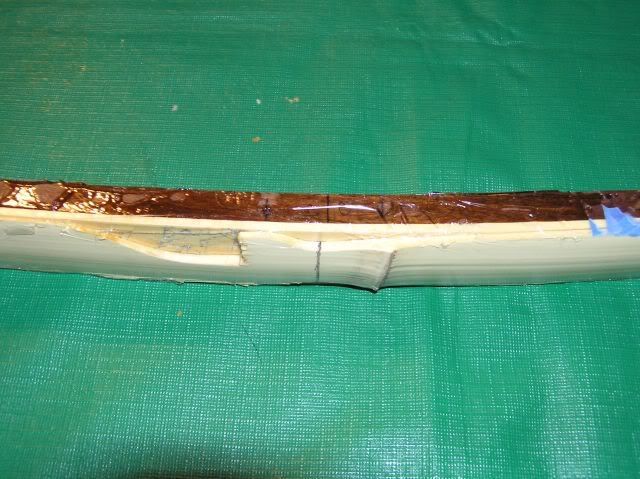 Here’s a look at the grip section, same deal here as well! I use a bandsaw to rough out the belly wood to match the bamboo limb pattern we just glued on. Then I use the sander to take down the last little bit, and the teeth marks from the bandsaw. Still, other than roughing it out, no finishing is done. Next up: glue on the grip wood. Due to the deflex, the main grip block, the zebra wood, has to be curved to match the bow. I usually make a pattern for this... However, this time I just drew the curve right on to the side of the zebra wood and roughed it on the bandsaw and then fit it with the sander... I probably won't do it that way again. It is worth the time to make a pattern that you can trace on to the side of the grip block. Then cut and shape in a very precise way. Also worth taking note of, if the belly wood is not really nice and flat through the grip section, you are in for it when you try to glue a grip block on to the belly side of the bow! 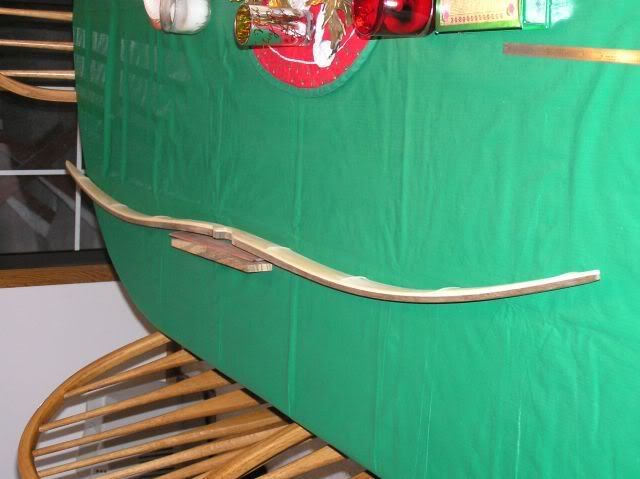 Here is a look at the bow after cleaning it up a bit. 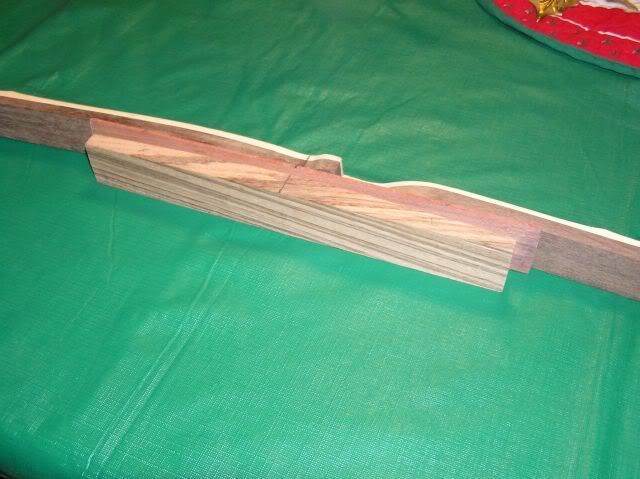 Here is a better shot of what I will put on for a grip. This wood will keep the bow from flexing in the middle, and give me some depth to form the grip from. I will probably add, later on, another bit of wood to fill out the heel of the grip right under the hand. Tomorrow, I will use the hacksaw blade on all glue surfaces and get things cooking. Then we can start on the tiller for this bow. Maybe Saturday night, certainly Sunday some time! |
|
smj
Forum Guide
  Traditional Council
Posts: 1,819
|
Post by smj on Dec 29, 2006 1:23:49 GMT -5
I forgot to mention above, but to take the glue off of the bamboo, I use a cabinet scraper. They work well for removing the rind as well, but a palm sander with 60 grit paper on it works really nice, too, and is a bit less work I think! You need to take care with the nodes of the bamboo – you could take them right off and that would certainly change the look of the bow! Sand them down a bit, but leave the lumps! I took one lump off at the grip, it happened to end up almost at the center line, and another off up at the tip where I need to glue the tip overlay in a bit. So we’ve got 3 nodes on the upper limb and 3 nodes on the lower limb as well. The nodes are not evenly spaced – I like to put the longer spacing between nodes, which is closer to the ground on the bamboo plant, no the lower limb with the closer spacing on the upper limb. With a pine pattern to use, it works out nice as you can move the boo around on your pattern to determine the look you want before you cut anything!
|
|


