Post by smj on Dec 11, 2007 1:48:42 GMT -5
Backing Pattern making for board bows…
OK – So I’ve not been posting much on bow making as of late. Some times life just gets to busy and involved! I have had some questions on bow making and thought I would put together a more detailed account of how I go about making a bow pattern. The use of a pattern is a great way to get started at building a bow. If you intend to use bamboo or two or more wood layers, this really helps when made and used right!
First, I go to the computer and call up AutoCAD to lay out the bow of my dreams. In this case, I want to build a bow that does not have a center-shot, rather, a bow that will require the arrow to shoot around the grip section of the bow. I intend to wallow in the wonders of the archers paradox. (for reference : www.texasarchery.org/Documents/ArchersParadox/Archersparadox.htm
)
Once I have the bow designed, I print it out. Now, to do this, you have to print it at 1:1 scale, and you have to break the bow into sections so that it can print out on my standard letter size printer. I print the upper limb on one page and the lower limb on another page. Once printed out, you have to cut the pattern out and mount it to the board that is to become your pattern. I label sections for the upper limb as Ux and lower limbs as Lx. I keep the order correct this way.
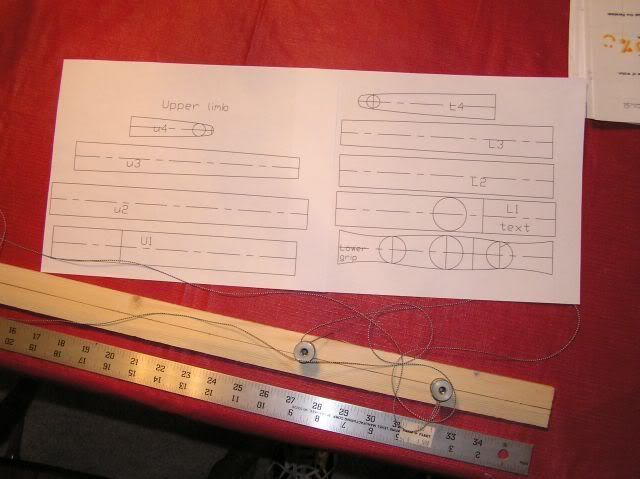
I like to use a pine slat from a local hardware shop, probably costs around $3 or $4 to buy. It is thinned out, but you will need to make certain that the slat does not bend to much to either side. A simple string and a couple end weights helps with this – just stretch the string from end to end for a true straight-edge to check your slat before buying. Then once home, I sand the slat smooth and flat, and then mark a centerline lengthwise down the board. I will use this line to mount my printed pattern on the slat.
Note that you will need to put a pencil or pen under the string so that it hangs true to the center. Don’t worry so much when buying the slat, but when you lay out for a pattern you will want a true straight line to work with. If you just drop the string from end to end rather than suspending it, the string can hang up on splinters and be offset one way or the other. This matters!
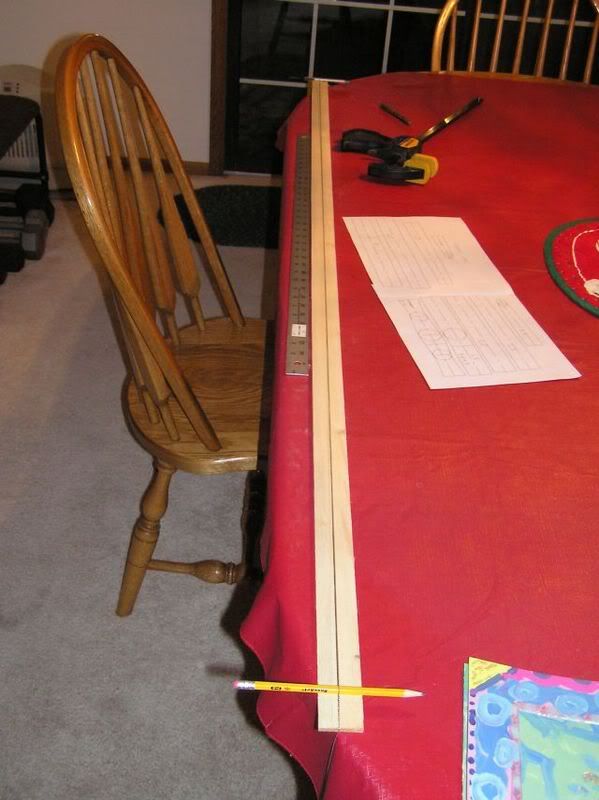
Once you have the centerline in place, sneak in under the line with a pen and mark a dot directly under the string. Then come back and connect the dots with a straight edge. Test your straight edge, too! Place it up against a window to confirm that it is a valid straight edge and not curved to one side. I use an aluminum rule to join the dots.

Note the difference between having the string raised up verses having it lay on the board. This would end up as curve in your bow that you would have to take out later by sanding the edges of the limbs to effectively move the tips to one side or the other.
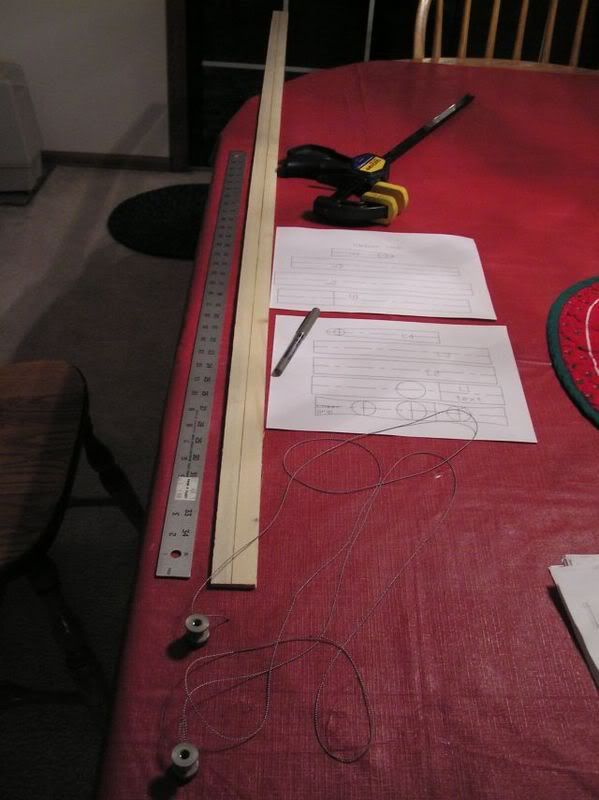
Once you have your pattern printed and the centerline marked, you are ready to make a pattern! I try to cut the black line in two, or stay to the outer edge of the black lines of the bow pattern parts. Mark the center of the slat both end to end and side to side, and then start to mount the paper pattern cutouts.
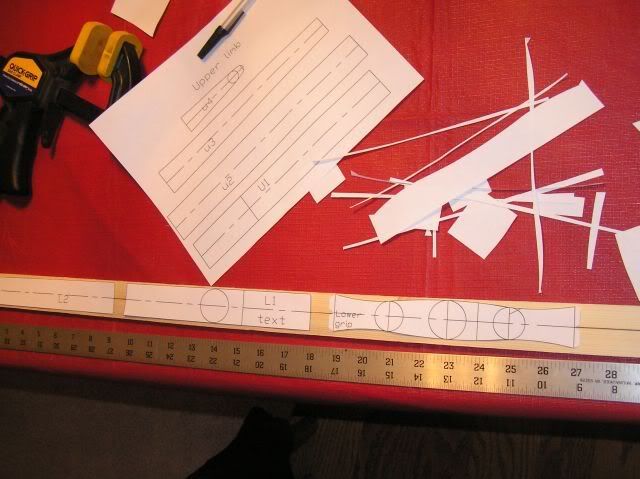
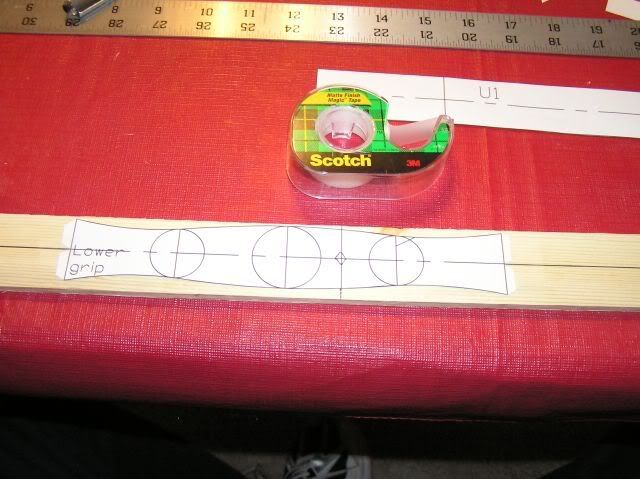
I tape the pattern cutouts to the slat so they don’t move, and align them to the center lines marked earlier. Once done, you have the entire backing pattern laid out, ready to trace.
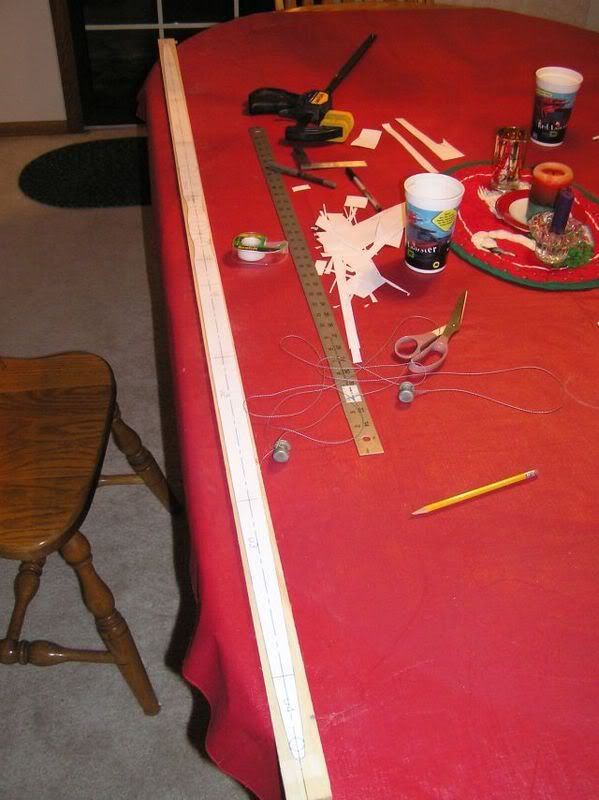
Now it is time to trace the pattern laid out to the slat. I use a fine point pen. The pattern is taped to the centerline, but can still move around while tracing. To stop this from happening, use something to press down on the pattern paper while tracing. Something that can move along with you is best! I used a big plastic triangle this time…
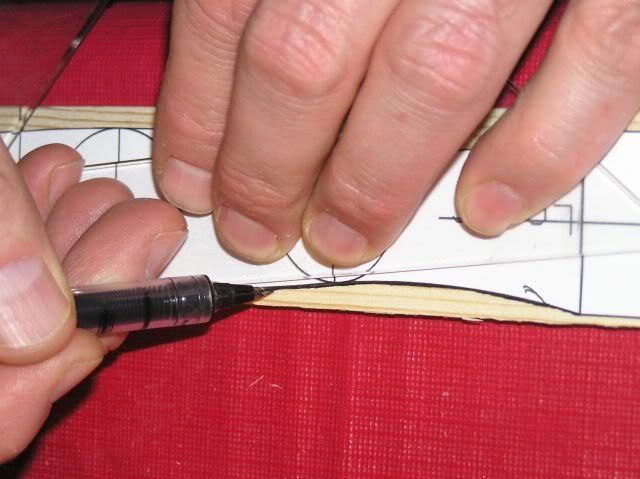
This keeps the paper from folding up on you, or getting pushed to the side very easily. When doing the tips, the tape runs off the end of the tip. Hence, I peel the tape off of the tip after the rest of the bow is done, holding the tip in place with one hand and tracing the tip with the other. It works! Once done tracing, remove the pattern paper and you should see your backing pattern.
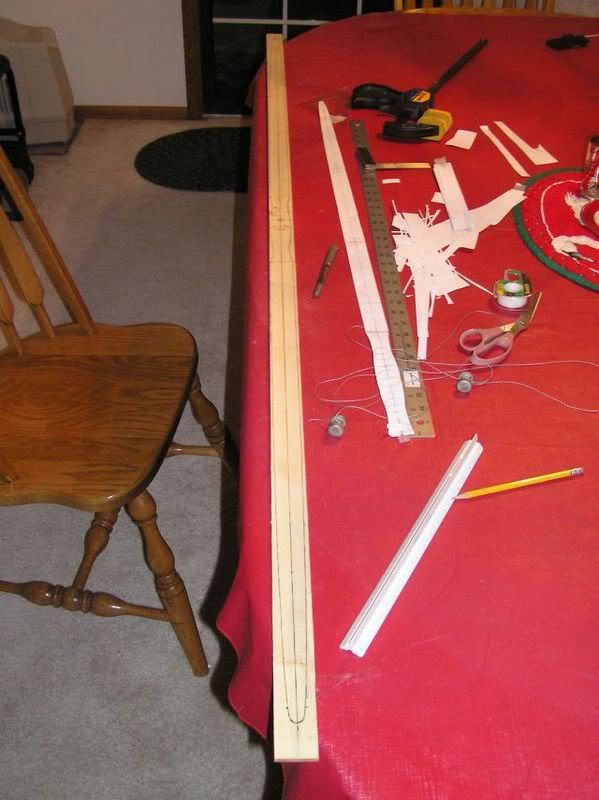
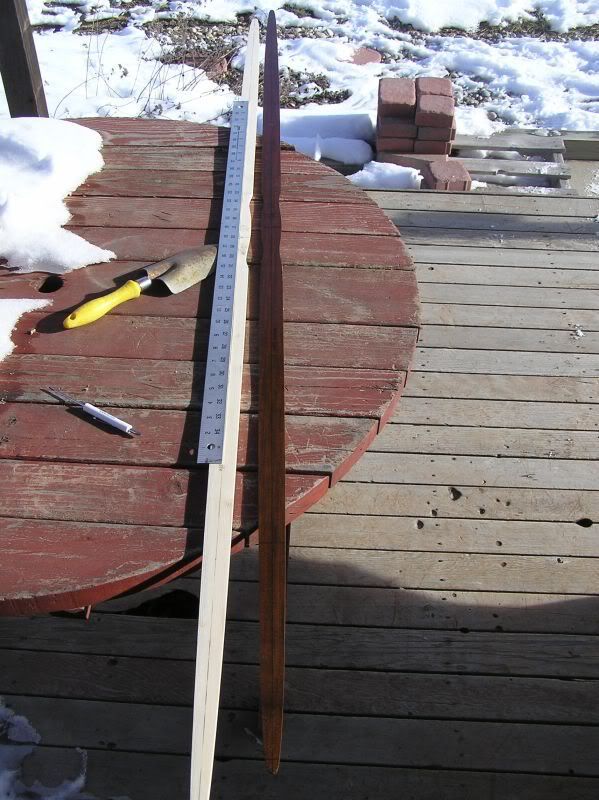
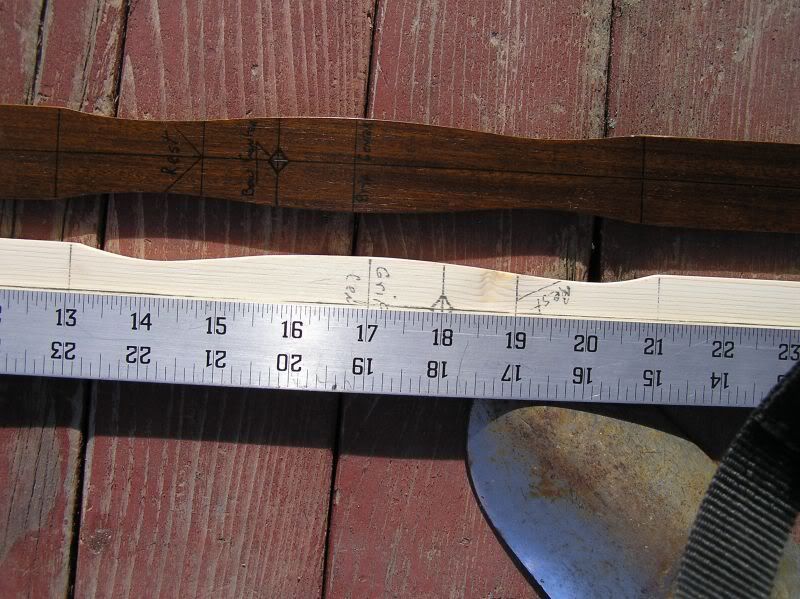
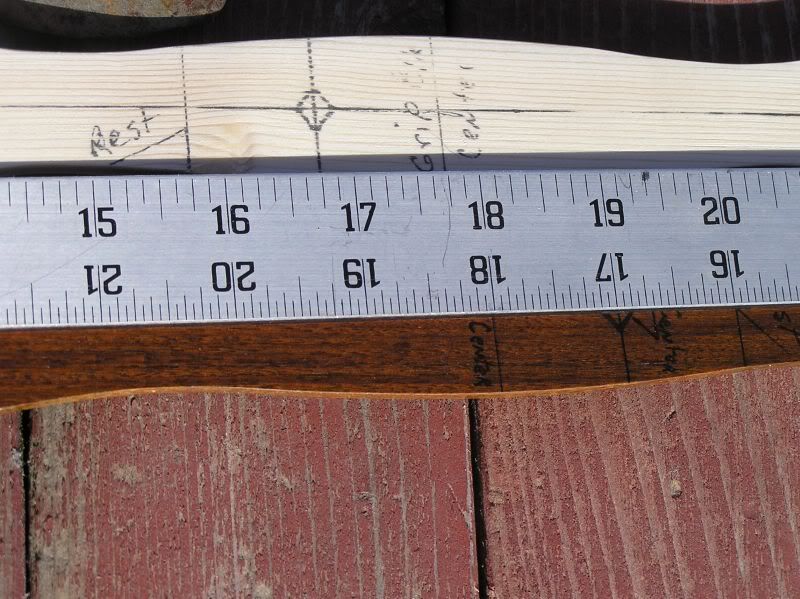
Once you have the pattern transferred, it is time to cut it out. You can use a saw, band saw, file, rasp, just about what ever you want to use to cut out the pattern. Once done, smooth up the edges so you don’t get splinters, and then put a good coating on it to seal it up. Check the centerline one more time to make sure that the board didn’t bend to one side after removing all the wood outside the pattern marks. This can some times happen. Once the finish is on the board, I’ve not had one bend on me.
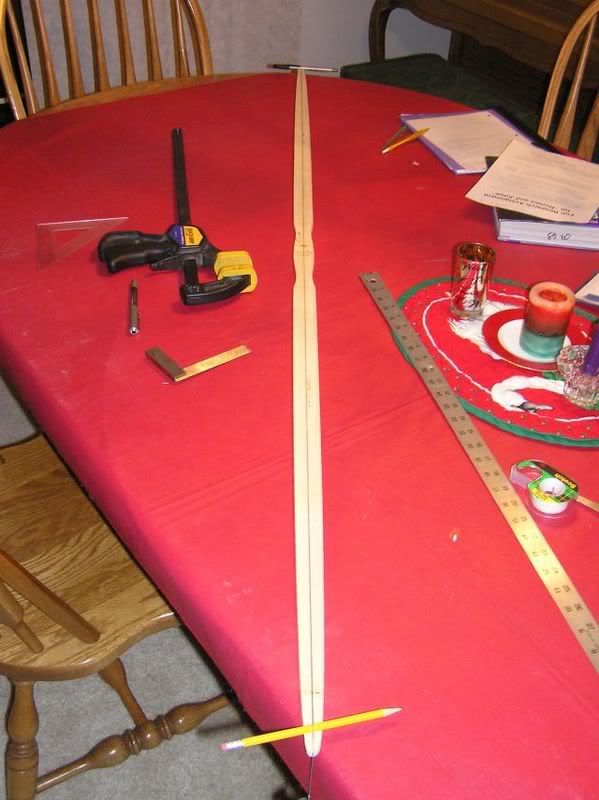
Now, when you want to build a bow you’ve got a pattern to create the backing layer from, and that can be used to form the outline of the bow. Keep it flat and dry, you can make bows for years from this pattern. Also, it is a cheap way to design a lot of bows without spending the time, effort, and expense of hacking out a bow from hardwood. It will also increase the odds of your being able to reproduce a bow that you like…
When using this approach, mark the centerline on the board that is to be the belly material. You will line up the backing pattern to this line and trace the pattern on the side of the bow that will become the back of the bow. Then trace the pattern on to the backing material and cut it out. When you go to glue up the bow, having the pattern on the belly material helps you to see that the backing material does not flex to one side while putting it on. Believe me, this can happen, and when it does you end up with a bow that is off of the centerline. This can be corrected if not to bad, but is a pain and can be avoided most of the time with a little care during the glue up. Hmmm, I suppose I should glue up a bow and show you the rest of the story here...
If you’d like a copy of this pattern, let me know, I can get you one!
Merry Christmas everybody!
PS - I'll try to read through this tomorrow and add in what ever I might have over-looked! Got questions? Please ask!
OK – So I’ve not been posting much on bow making as of late. Some times life just gets to busy and involved! I have had some questions on bow making and thought I would put together a more detailed account of how I go about making a bow pattern. The use of a pattern is a great way to get started at building a bow. If you intend to use bamboo or two or more wood layers, this really helps when made and used right!
First, I go to the computer and call up AutoCAD to lay out the bow of my dreams. In this case, I want to build a bow that does not have a center-shot, rather, a bow that will require the arrow to shoot around the grip section of the bow. I intend to wallow in the wonders of the archers paradox. (for reference : www.texasarchery.org/Documents/ArchersParadox/Archersparadox.htm
)
Once I have the bow designed, I print it out. Now, to do this, you have to print it at 1:1 scale, and you have to break the bow into sections so that it can print out on my standard letter size printer. I print the upper limb on one page and the lower limb on another page. Once printed out, you have to cut the pattern out and mount it to the board that is to become your pattern. I label sections for the upper limb as Ux and lower limbs as Lx. I keep the order correct this way.

I like to use a pine slat from a local hardware shop, probably costs around $3 or $4 to buy. It is thinned out, but you will need to make certain that the slat does not bend to much to either side. A simple string and a couple end weights helps with this – just stretch the string from end to end for a true straight-edge to check your slat before buying. Then once home, I sand the slat smooth and flat, and then mark a centerline lengthwise down the board. I will use this line to mount my printed pattern on the slat.
Note that you will need to put a pencil or pen under the string so that it hangs true to the center. Don’t worry so much when buying the slat, but when you lay out for a pattern you will want a true straight line to work with. If you just drop the string from end to end rather than suspending it, the string can hang up on splinters and be offset one way or the other. This matters!

Once you have the centerline in place, sneak in under the line with a pen and mark a dot directly under the string. Then come back and connect the dots with a straight edge. Test your straight edge, too! Place it up against a window to confirm that it is a valid straight edge and not curved to one side. I use an aluminum rule to join the dots.

Note the difference between having the string raised up verses having it lay on the board. This would end up as curve in your bow that you would have to take out later by sanding the edges of the limbs to effectively move the tips to one side or the other.

Once you have your pattern printed and the centerline marked, you are ready to make a pattern! I try to cut the black line in two, or stay to the outer edge of the black lines of the bow pattern parts. Mark the center of the slat both end to end and side to side, and then start to mount the paper pattern cutouts.


I tape the pattern cutouts to the slat so they don’t move, and align them to the center lines marked earlier. Once done, you have the entire backing pattern laid out, ready to trace.

Now it is time to trace the pattern laid out to the slat. I use a fine point pen. The pattern is taped to the centerline, but can still move around while tracing. To stop this from happening, use something to press down on the pattern paper while tracing. Something that can move along with you is best! I used a big plastic triangle this time…

This keeps the paper from folding up on you, or getting pushed to the side very easily. When doing the tips, the tape runs off the end of the tip. Hence, I peel the tape off of the tip after the rest of the bow is done, holding the tip in place with one hand and tracing the tip with the other. It works! Once done tracing, remove the pattern paper and you should see your backing pattern.

Once you have the pattern transferred, it is time to cut it out. You can use a saw, band saw, file, rasp, just about what ever you want to use to cut out the pattern. Once done, smooth up the edges so you don’t get splinters, and then put a good coating on it to seal it up. Check the centerline one more time to make sure that the board didn’t bend to one side after removing all the wood outside the pattern marks. This can some times happen. Once the finish is on the board, I’ve not had one bend on me.

Now, when you want to build a bow you’ve got a pattern to create the backing layer from, and that can be used to form the outline of the bow. Keep it flat and dry, you can make bows for years from this pattern. Also, it is a cheap way to design a lot of bows without spending the time, effort, and expense of hacking out a bow from hardwood. It will also increase the odds of your being able to reproduce a bow that you like…
When using this approach, mark the centerline on the board that is to be the belly material. You will line up the backing pattern to this line and trace the pattern on the side of the bow that will become the back of the bow. Then trace the pattern on to the backing material and cut it out. When you go to glue up the bow, having the pattern on the belly material helps you to see that the backing material does not flex to one side while putting it on. Believe me, this can happen, and when it does you end up with a bow that is off of the centerline. This can be corrected if not to bad, but is a pain and can be avoided most of the time with a little care during the glue up. Hmmm, I suppose I should glue up a bow and show you the rest of the story here...
If you’d like a copy of this pattern, let me know, I can get you one!
Merry Christmas everybody!
PS - I'll try to read through this tomorrow and add in what ever I might have over-looked! Got questions? Please ask!

