oldgun
Board Regular

Posts: 516
|
Post by oldgun on Mar 28, 2010 14:33:00 GMT -5
The shelf on my recurve is flat, smj has offered to show me how, in a new project, to curve this shelf an easy way. Hopefully others can benifit from this thread. Thanks smj! I will try to follow along at the same time.
|
|
smj
Forum Guide
  Traditional Council
Posts: 1,819
|
Post by smj on Mar 28, 2010 21:09:34 GMT -5
So - here is the bow I plan on modifying - I have another I could do as well. Is this one a good match to yours? 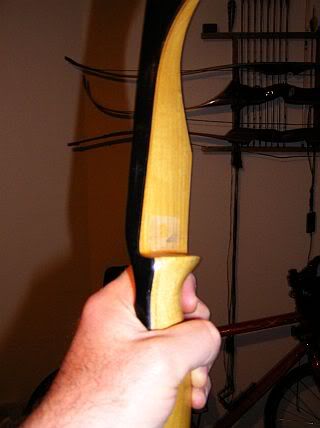 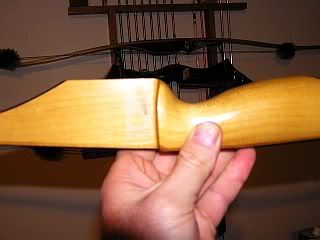 As you can see, this one has a little shape to the flat of the rest, but not what I want... |
|
oldgun
Board Regular

Posts: 516
|
Post by oldgun on Mar 29, 2010 9:13:34 GMT -5
They are the same except mine is maybe flatter, hard to tell as the old rug glued on there is covering up most and is pretty ratted. A real mess. Will take pics of mine as we go and show you the final result. (need new batteries for the camera) Thanks smj!! I'll be down town soon can you give me a list of what I'll need?
|
|
smj
Forum Guide
  Traditional Council
Posts: 1,819
|
Post by smj on Mar 29, 2010 23:07:26 GMT -5
Didn't get a chance to work on this today, should be able to get some time tomorrow night.
|
|
smj
Forum Guide
  Traditional Council
Posts: 1,819
|
Post by smj on Mar 30, 2010 21:55:49 GMT -5
When making a bow, I like to shape the shelf or add a small block of wood and shape it in to the rest I want. When modifying an existing bow, I prefer to respect the original finish when ever possible. Materials - I like to work with cork when adding to a bow. It absorbs shock and is easy to work with. Once done, cover it up with something that will stand a bit of wear - otherwise it does wear away quickly! For the first time doing this, you might want to use rubber cement rather than contact cement... Less severe to change if you want to change the setup a second time... Add to the list a razor blade and some sandpaper.  There are three basic placements for the high point when shooting off the rest: mid rest, rest towards the back, rest towards the belly. On longbows, I like the highest point of the rest towards the belly of the bow. For bows with a deeply formed grip, like this one I am about to modify, I align the highest point of the rest with the deepest point of the grip - 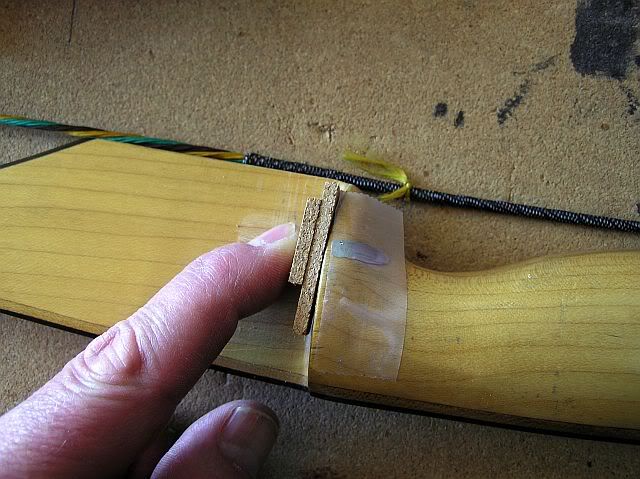 How high you raise the rest is up to you. This bow has some curve to the rest, but if I go two thicknesses, I'll get the arrow about the same height that it was using the stick on rest. Glue the two parts of cork together, and we'll continue on from there next time. Next time we'll glue to the bow, so if you just want to try this but are worried, use the rubber cement to glue to the bow. Use the contact cement, or what ever stronger glue you like, to join the cork layers together. Later PS - In case you can't read it, the cork is 1/8th inch thick. Comes in rolls, obviously, and I buy mine at TrueValue Hardware. I use it on the top of my work bench as well - great surface to work on for what I do. |
|
smj
Forum Guide
  Traditional Council
Posts: 1,819
|
Post by smj on Mar 30, 2010 22:01:14 GMT -5
Here is an aside - nothing to do with the rest... maybe....  Anyway - I've not seen the nock stick to the tip of the incoming arrow before. When I pulled them apart - there it was! The incoming arrow had driven the nock right up the shaft, and was wedged on the tip - 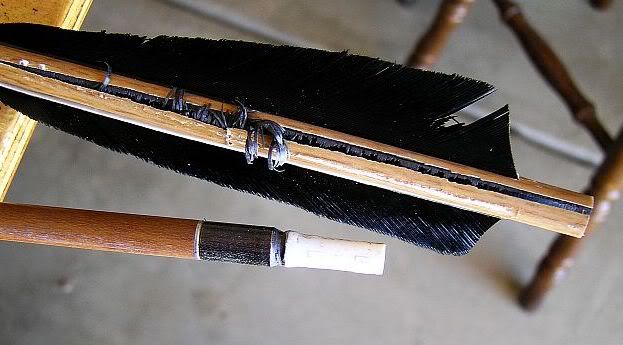 |
|
oldgun
Board Regular

Posts: 516
|
Post by oldgun on Mar 31, 2010 18:31:45 GMT -5
Got my cork and glue today and am following along (also got the batteries for the camera) was looking for some kind of covering and the shop was all out of supplies. Would the smooth part of velco work? might not last long but it feels like it should. Also what would you use for the plate on the side of the bow? Thanks again. On the side my brother had the sights set for at lest 60 yards he never shot a deer with any bow thank goodness. He did get a pheasant at about 90 yards and he is the first to say that it was all luck.
|
|
smj
Forum Guide
  Traditional Council
Posts: 1,819
|
Post by smj on Mar 31, 2010 22:30:44 GMT -5
OK – so once the two parts are together, we can shape them. I like to place about a 60 grit paper on a nice flat surface, the side of a 2x4 in this case, and just drag the part over the grit. It wears down very fast – so go slow or make up a couple parts as spares… It goes really quick, and you can control the sanding with ease – though it may take a bit of practice. If you bought a roll of cork, you have a lot of material. I like the string side, or belly side, steep but smooth. Nothing to catch a fletch on. The other end, I like a longer smooth taper down to a thin edge. Word to the wise: shape the footing first. It is really hard to sand the cork once it is a thin edge. First the footing, or shape of the rest:  Now we tip the part up at a steep angle, support the back with your pointer finger, and drag it over the grit until a nice rounded edged shape appears.  Make sure that the high spot is over the sweet spot! Also, make sure you leave the high spot flat. You don't want the arrow to tend to slide off the rest! 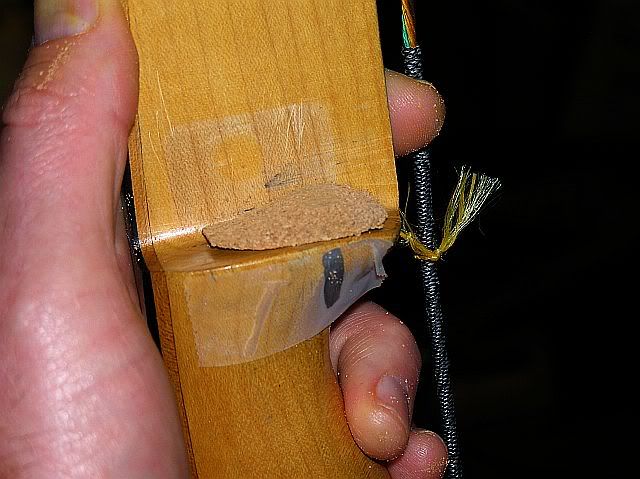 Before we glue it on, there is another step we might consider – weather proofing. Sorry, but that will be tomorrow! |
|
smj
Forum Guide
  Traditional Council
Posts: 1,819
|
Post by smj on Apr 3, 2010 19:46:52 GMT -5
OK - enough is enough - let's finish this off! When getting ready to glue, it is a good idea to mark an outline of where to put stuff... Like the lump of cork... A light mark, and trace it under the edge so it won't show once the part is glued on. 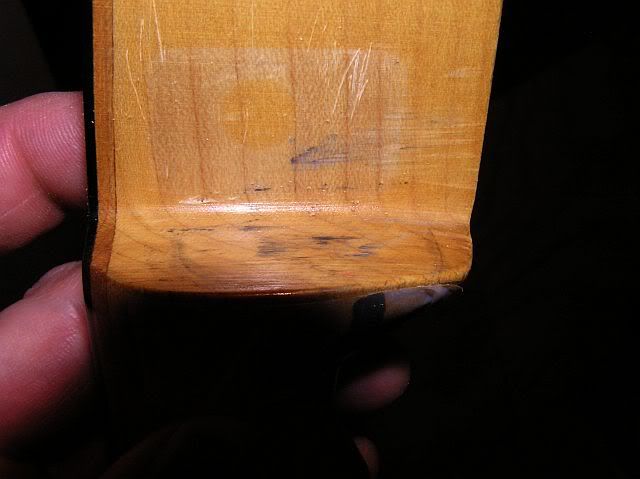 I like to seal up the cork with a good covering of gel type super glue. Once dry, then glue it to the shelf. The glue helps hold the cork together, too. Once that is glued on, it is time to glue on the backing above the rest. I will use leather from an old belt. Belts are made of several layers, the outer layer is often soft and thin. It looks like it will work for this application. 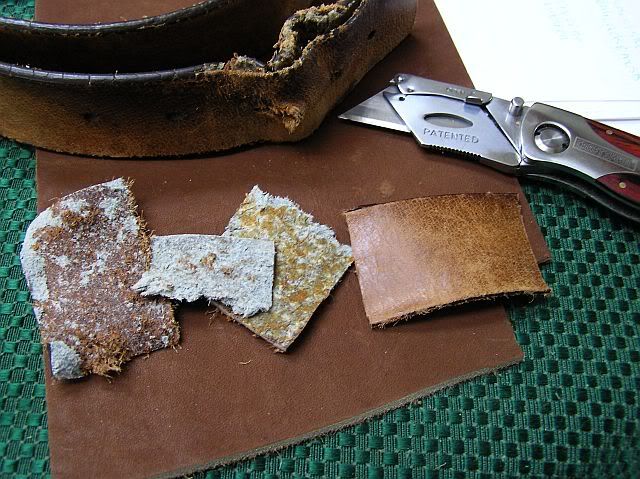 Clean up the back of it a bit, and size it to the rest and bow. I used a hacksaw blade to - with great care not to nick the finish - to open up the gap at the back of the cork rest. This allows the leather to slip in behind the cork.  The leather can be cut out with just about anything you want to work with - but do even up things up better than I did on this one! Looking at the pictures, I can see that I did a quick job on a bow that never gets shot other than club picnics! ;D  Cut it out, mark it up, and glue it on - 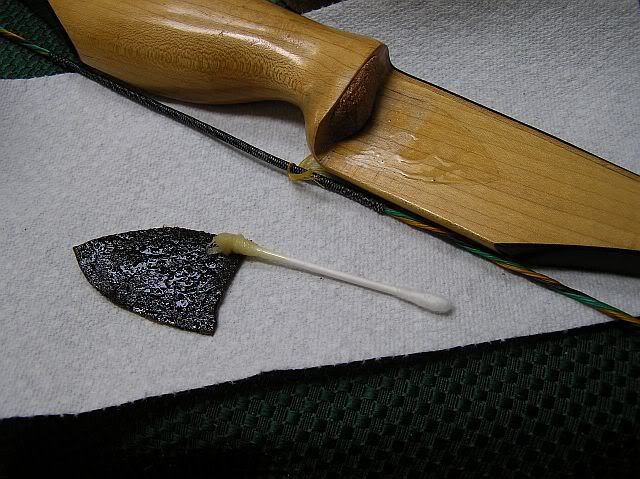 Keep in mind that this is leather... Once the glue is dry, you can put mink oil on the leather, or shoe wax, what ever you like to seal it up. The glue won't care. This bow won't be out in bad weather, so I won't bother here. Once the back is in place, we will also glue on a leather patch over the cork. This will protect the cork, which is soft and not so durable. Trim around the shelf with care, so you don't trim away any of the bow finish, with a sharp razor blade. (If you nick the finish, smear a bit of gel super glue on it... Just enough to cover adn seal the nick.) Last of all, the arrow rest itself. I am using Velcro - the fuzzy part. It is cheap. This has a sticky backing on it - we'll have to see how long and well is sticks on. If it comes off, I will glue it on with the contact cement. 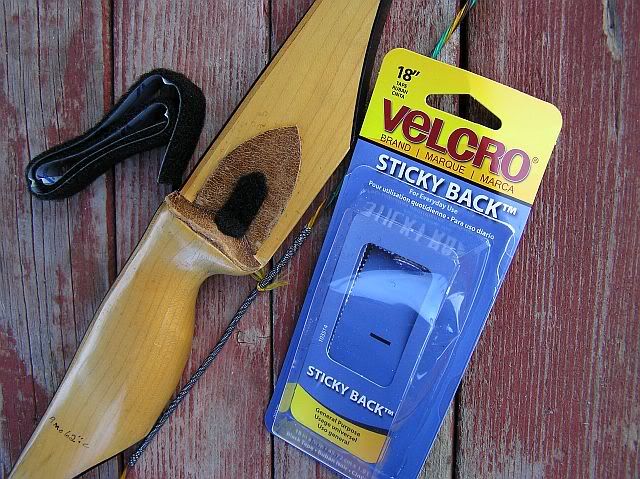 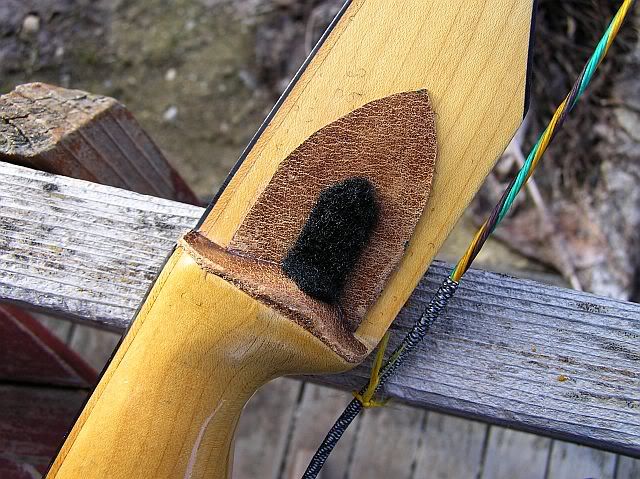 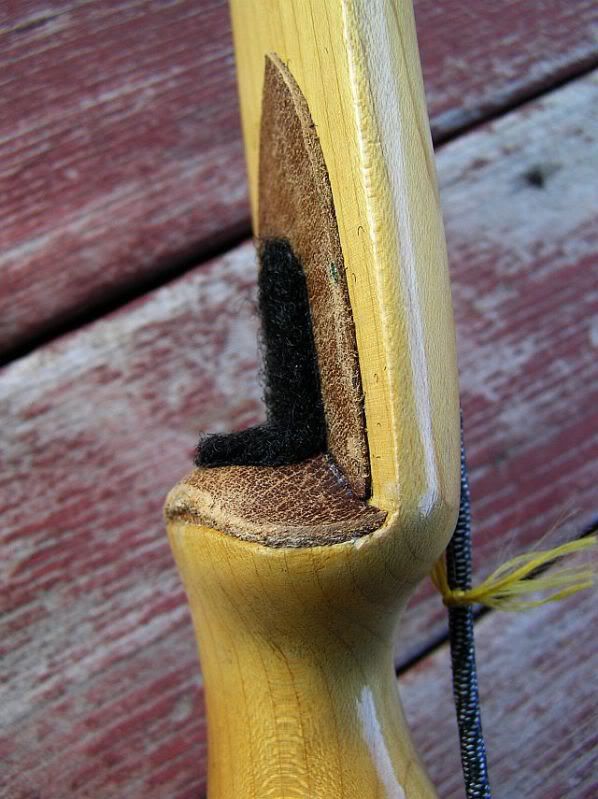 You can do this with wood, too. But to make it look right in the end I always seem to end up refinishing the grip. Oldgun - if you don't have materials, drop me a PM and I'll mail you some of the old belt and some fuzzy Velcro for your bow. If you want! |
|
smj
Forum Guide
  Traditional Council
Posts: 1,819
|
Post by smj on Apr 3, 2010 19:54:56 GMT -5
Oh yeah, note in the last two pictures, the lump is over the deepest curve of the grip. And the total height will place the arrow about where it was originally. However, I will still check the setup and adjust as needed so it shoots well. Last, I really don't know how well the sticky back velcro will stay on in the rain. Might be better to just get the non-sticky back and glue it on properly with contact cement. Seems to stay on well enough in dry weather !
|
|